Approvals Category
Approvals FAQ
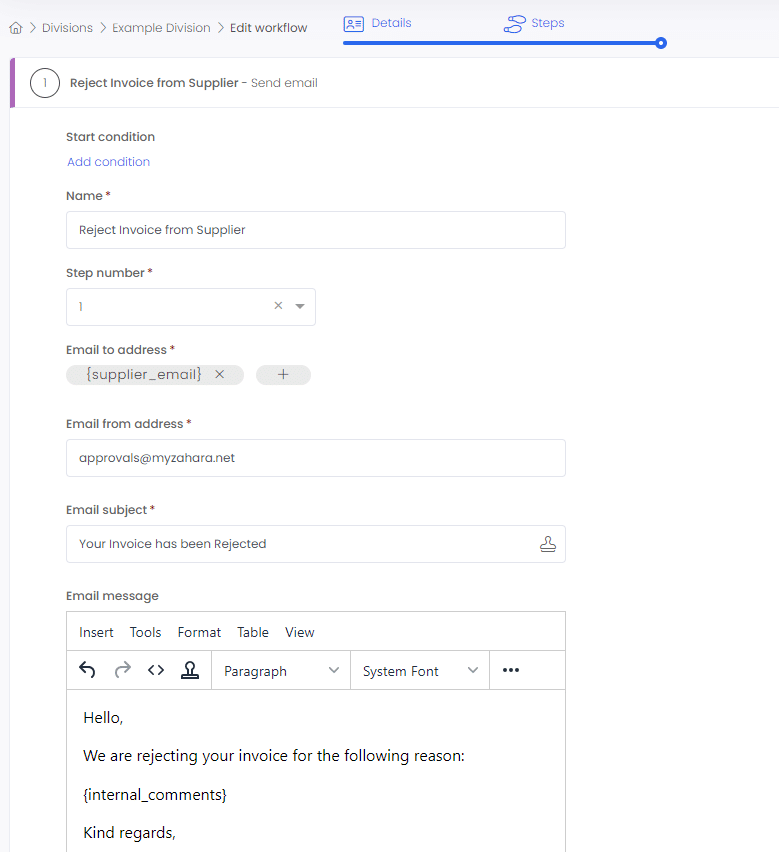
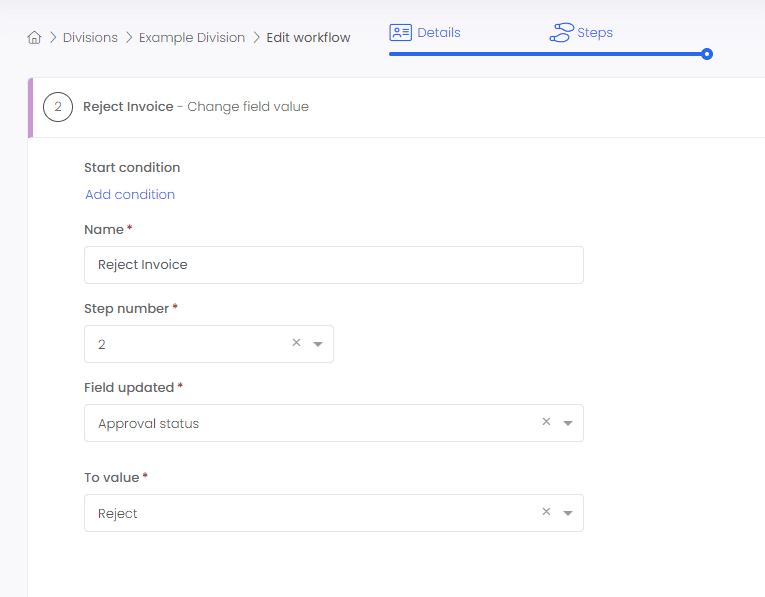
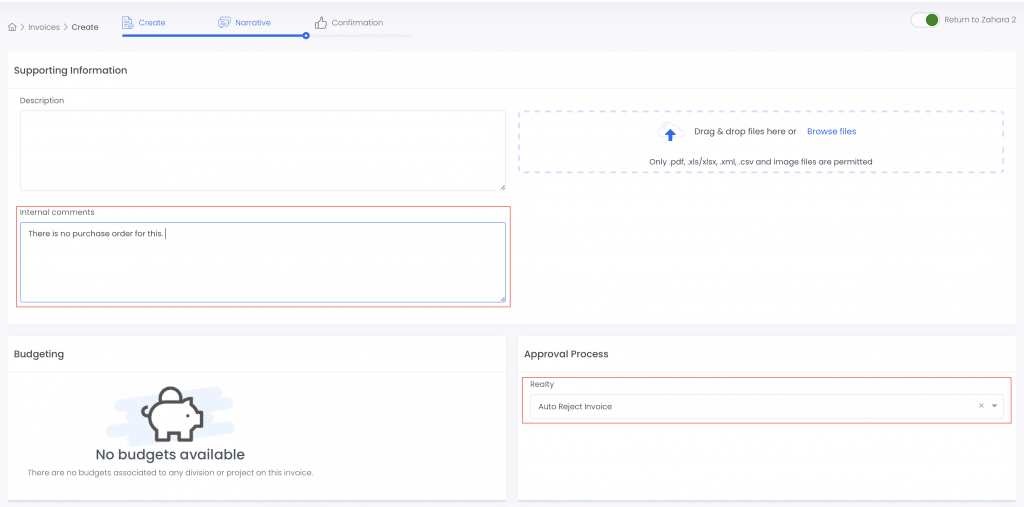
Auto rejecting of invoices issue
Coding approvals
Creating Approvals
Division Management
Flashing invoice approval icon
How to approve or reject
Leaver process – Approver
Mandatory Approval Comments
Supplier approvals
Workflows & Approvals
Workflows & Approvals (part 2)