


Business Unit Category
Add an email signature
Coding Restrictions
Create new Business Unit
Custom Fields on Line Items
Customised labels
Date formating
Default delivery address
Division Management
Editing Email Templates
How to hide cost codes
Invoice email forwarding – Microsoft 365
Pros and Cons of Using Zahara’s Inbuilt Email Service vs. Your Own SMTP
SMTP & Email Sending
T&C on your PO Template
Invoice Processing Help Category
Auto reject supplier invoices
Auto rejecting of invoices issue
Finding an order or invoice
How to create a credit note
Invoice email forwarding – Microsoft 365
Invoice export colours
Invoice Inbox
Invoice List View
Invoice matching
Invoice Processing Explained
Month end cut offs
Negative Order Balance
Setting up Autopilot
Supplier Matching
Waiting for a GRN
Purchase Orders Category
Adding a product to an order
Adding documents to an order
Bulk importing orders
Close Orders Automatically
Closing an order
Copy PO to Buyer
Creating a Purchase Order
Deleting a PO
Duplicate Order Prevention
Editing an order
Finding an order or invoice
GRN an Order – Learn with this Guide
Grouped Purchase Orders
Import Line Items
Negative Order Balance
PO Template Editing
Product Centric Buying
Purchase Order Numbering
Purchase Order PDF
Purchase Order Prefix
Purchase Requisition Number
Quick Create a Purchase Order
Send PO to Supplier
Supplier order acceptance
What is a Purchase Order?
This article will explain the initial setup process, and a breakdown of the settings to configure the Currencies Direct integration, aimed at Tenancy Admins who are looking to get set up. If you are interested in enabling Currencies Direct for your tenancy, please contact our Customer Success team.
Once Currencies Direct has been enabled on your tenancy, navigate to the Business Settings, and click on the newly appeared Payments tab. You will see two options:
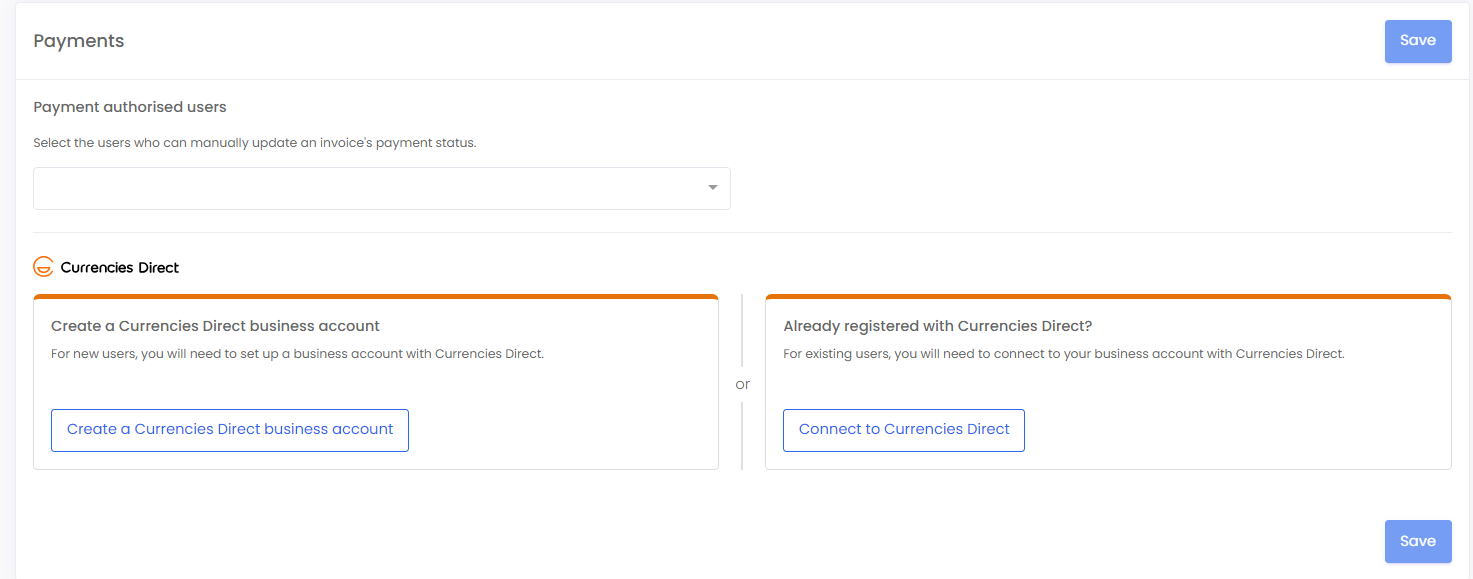
If this is your first time using Currencies Direct and do not have an account, please click the option on the left to create a new account.
Click the option on the right if you have already connected one business unit and need to connect another to the same account, you will have an option to select the Currencies Direct account to connect.
Upon clicking the left button to create a new Currencies Direct business account, you will see the following:
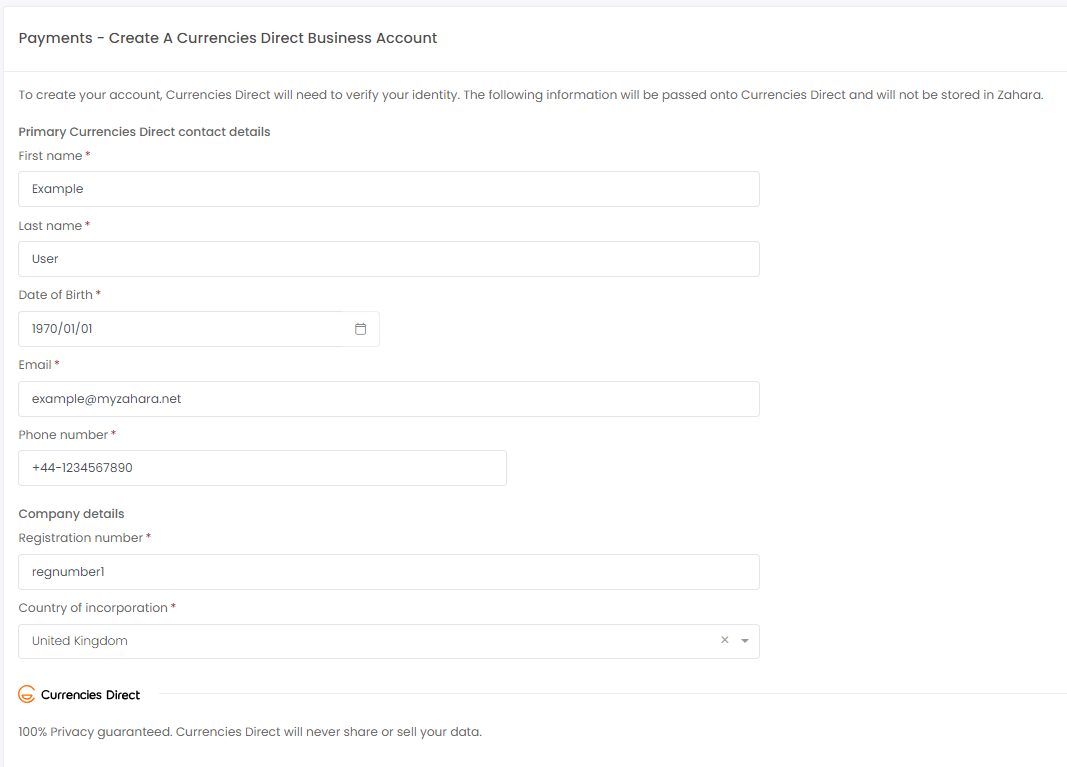
Fill out this form with the correct details and submit. This will automatically send to Currencies Direct who will facilitate the account creation process.
You will receive a prompt if you do not have a country set in your business unit. To set this please navigate to the Details tab of your business settings. Another possible issue may also be that the phone number entered is invalid, ensure that this has been input with the country code separated by a hyphen from the body of the number as in the above example.
Once you have created an account and this has been processed by the Currencies Direct team, you will gain access to the full settings page.
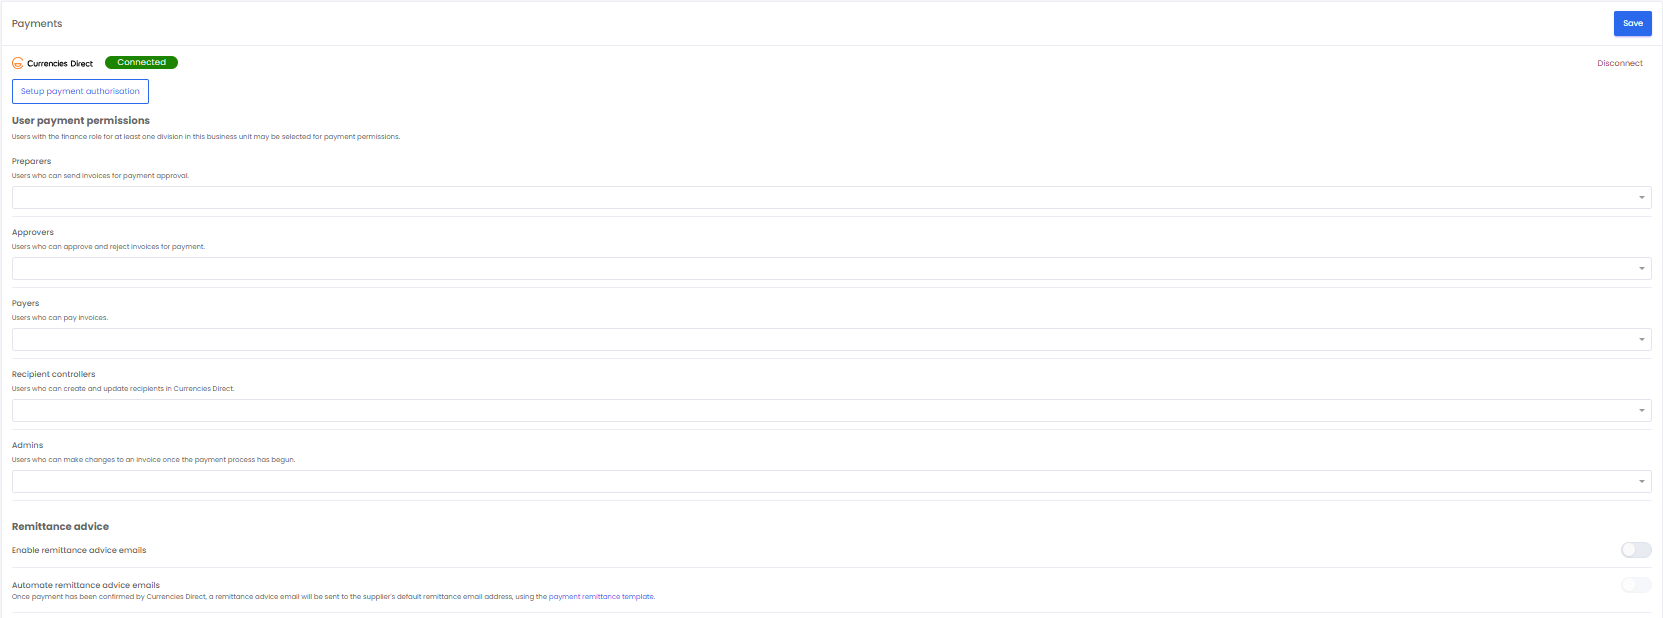
In this section we will run through all of the settings available on this page.
Payment Authorisation
This will be relevant to only Payers or Recipient Controllers. Setting up payment authorisation will provide a pin code to be entered when setting up recipients in Zahara or making payments, as an extra layer of security.
To set this up, download any authentication app on your mobile device. Add a new account by pressing the ‘+’ button on the application. Going back to the Payments settings screen, click the Payment Authorisation button will open a QR Code. Scan this into the app, and it will provide a pin code to be entered when prompted while processing payments. Ensure any user with the Payer or Recipient Controller role has this configured.
Roles
Next is a series of fields where you can select the desired users for each role. The same user can have multiple roles. In order to appear on this list as an option, a user must have both:
To configure these permissions, you will need to navigate to the Tenancy user settings page. Please see our guide on user permissions for more information.
We also have articles on each of these roles to explain specifically their role in the payments process.
Remittance Advice
Enabling this option will allow you to manually send recipients remittance information after making a payment to them. You may also wish to enable the second option which will automatically send the email upon making a payment.
The email sent is fully customisable; click the hyperlink next to the setting, or navigate to your HTML settings in order to view and edit the template titled Payment Remittance. Note that you will need to enable this option in order for the template to appear. For information on how to edit the template, please see our guide on HTML templates.
Wallets
At the bottom of this page, you will see a preview of your available wallets. Here you can review the currency, total balance, outstanding balance, and available balance.
The outstanding balance is the value of any invoices with the status of ‘Scheduled for Payment’.
You may also filter and search for wallets, and bookmark important balances.
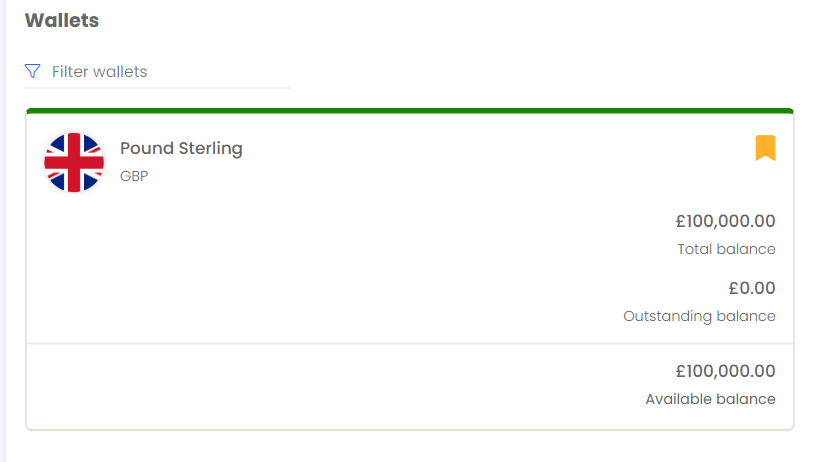
Note that you cannot make changes to the wallet within Zahara. To add funds or make any changes, please log in to Currencies Direct.
