Business Unit Category
Add an email signature
Coding Restrictions
Create new Business Unit
Custom Fields on Line Items
Customised labels
Date formating
Default delivery address
Division Management
Editing Email Templates
How to hide cost codes
Invoice email forwarding – Microsoft 365
Pros and Cons of Using Zahara’s Inbuilt Email Service vs. Your Own SMTP
SMTP & Email Sending
T&C on your PO Template
Invoice Processing Help Category
Auto reject supplier invoices
Auto rejecting of invoices issue
Finding an order or invoice
How to create a credit note
Invoice email forwarding – Microsoft 365
Invoice export colours
Invoice Inbox
Invoice List View
Invoice matching
Invoice Processing Explained
Month end cut offs
Negative Order Balance
Setting up Autopilot
Supplier Matching
Waiting for a GRN
Purchase Orders Category
Adding a product to an order
Adding documents to an order
Bulk importing orders
Close Orders Automatically
Closing an order
Copy PO to Buyer
Creating a Purchase Order
Deleting a PO
Duplicate Order Prevention
Editing an order
Finding an order or invoice
GRN an Order – Learn with this Guide
Grouped Purchase Orders
Import Line Items
Negative Order Balance
PO Template Editing
Product Centric Buying
Purchase Order Numbering
Purchase Order PDF
Purchase Order Prefix
Purchase Requisition Number
Quick Create a Purchase Order
Send PO to Supplier
Supplier order acceptance
What is a Purchase Order?
If you haven’t used purchase orders before, we have a useful article on “what is a purchase order” which has some background information. This article explains how to create a purchase order in Zahara.
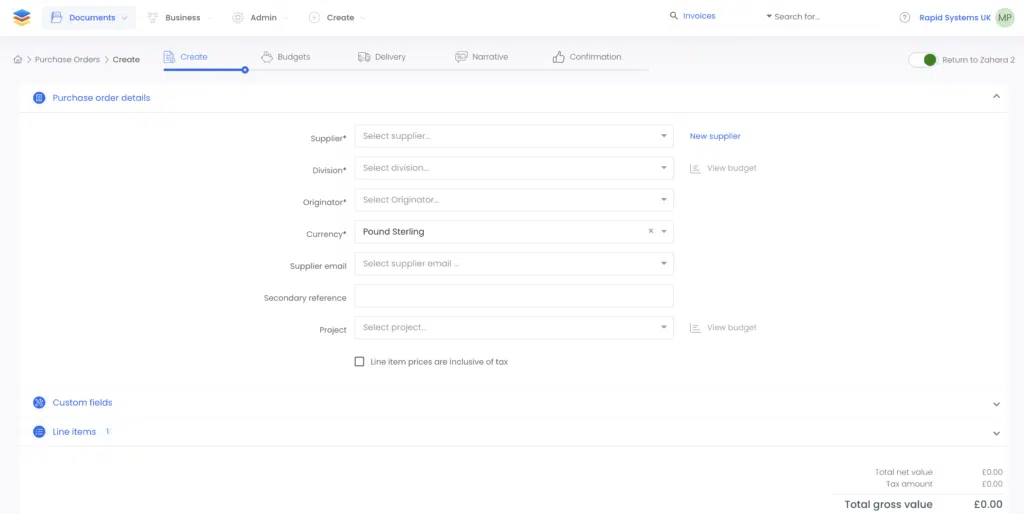
The next panel – if you are using custom fields – is the custom fields panel. Any fields you have enabled or set up will appear here. These will respect any parents and children that may have been created as well.
The next panel is where you create the line items or the narrative of the order.

Product selector – if the Supplier chosen has recorded products / items, these can be selected from the “Choose a Product” selector and dropped onto the line items.
Switching to table view – there is a table icon on the right which will switch you onto a table view – this is useful when you have created multiple line items.
Import from CSV – here you can import line items from a CSV file – see this dedicated article
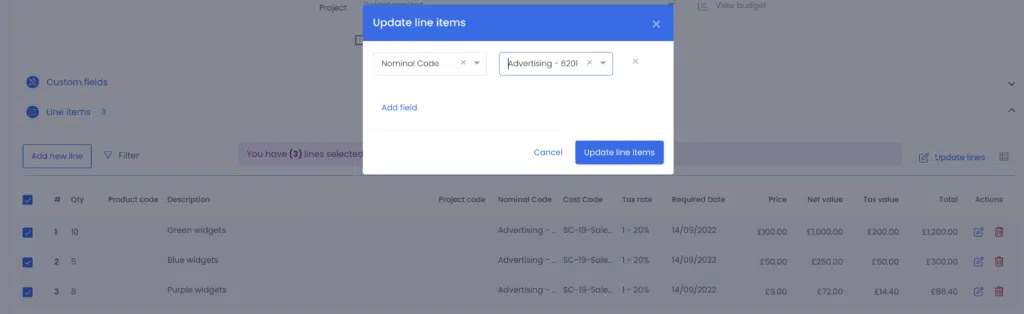
Now you can populate your line item, adjusting any of the fields or pre-selected values. If you are creating a one line item order, you will click Continue, in blue bottom right. If you are adding more line items, you will click Add new line item. Switching to table view will enable you to see all your lines as shown below:
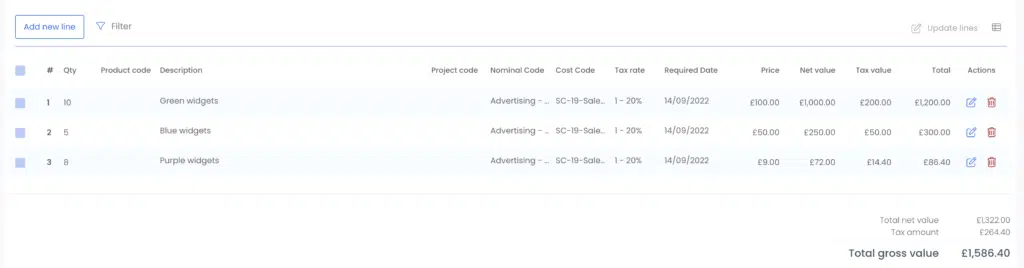
You can then edit individual line items by clicking the blue edit icon, or switch back into edit mode by clicking the table icon again. You can also bulk update all line items by selecting them as shown below:
Once you have all of your lines perfect, you can move on by clicking continue.
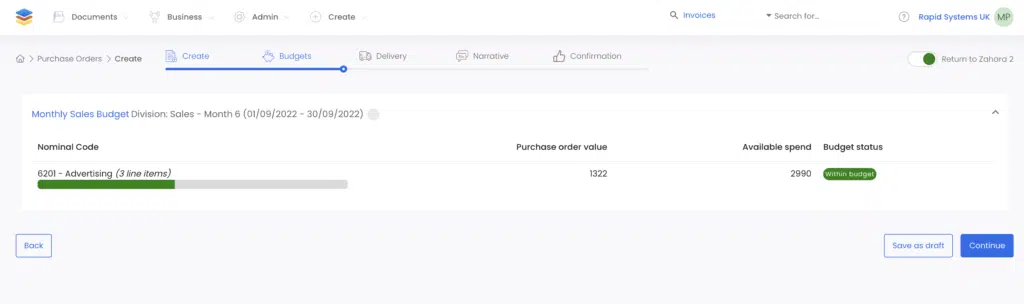
The next panel is the optional Budgets panel. This is shown below and is for the creator’s benefit to see how the Budget (if any) is affected by the order.
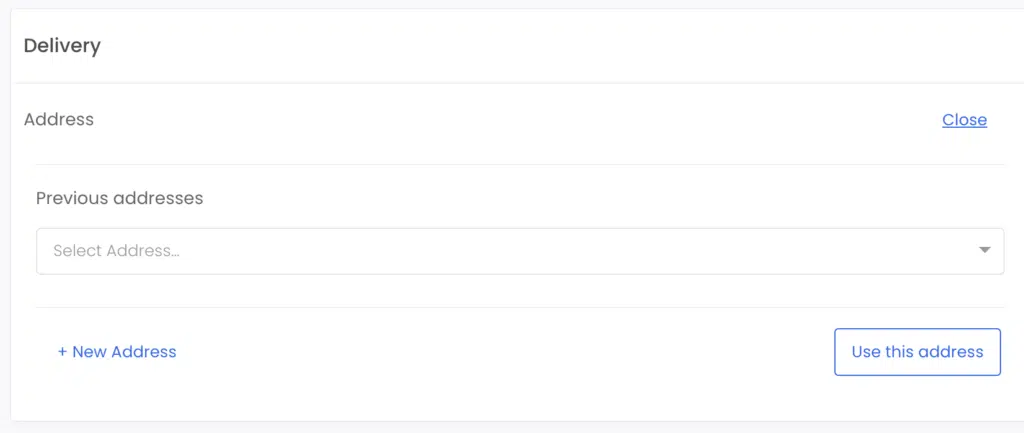
The delivery panels shows the default delivery address. This is set in Business Settings > Purchase Orders and will be one of Business Unit, Division or Project. You can change the address though. You can select any other address or type in a new address
You can also change the Required by date. This can be set at a Line item level if set in Business Settings > Purchase Orders. Otherwise, set the required by date. This can be used as a value on a purchase order and for reporting / accruals.
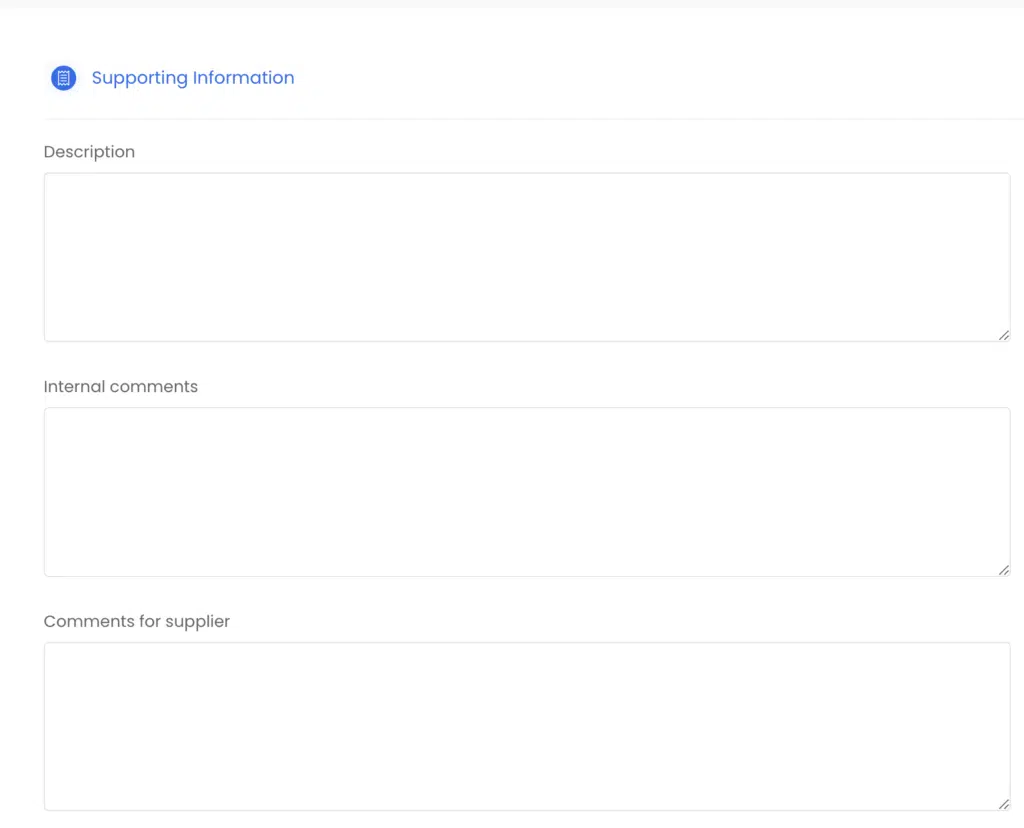
This panel is all about comments and providing the narrative for either an approver or a supplier. Internal comments is the field for approval comments – perhaps the justification for the purchase. The supplier field can be used to add comments that show on the Purchase Order PDF like “need this urgently”
You can add documents to the purchase order. These might be supporting documents for the supplier or the approver. You can drag them over to the panel and then select what kind of file you are attaching. This is limited to one document only though.
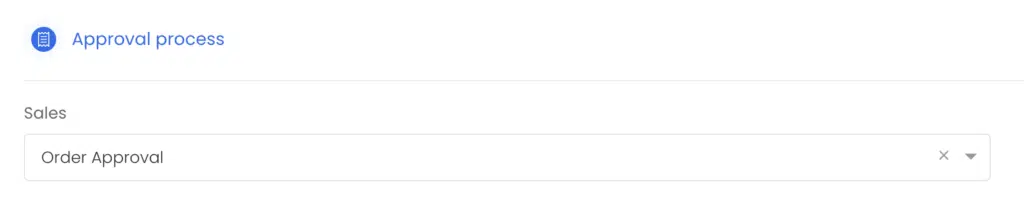
At the bottom of the Narrative panel is the workflow selector. If you have permission to override the workflow, you can do that here. Otherwise the pre-set workflow will show.
You can save the purchase order as a Draft at any time. This means the Purchase can be edited but hasn’t been submitted yet. If a purchase is saved as a Draft, it will show with a Draft icon as shown below:
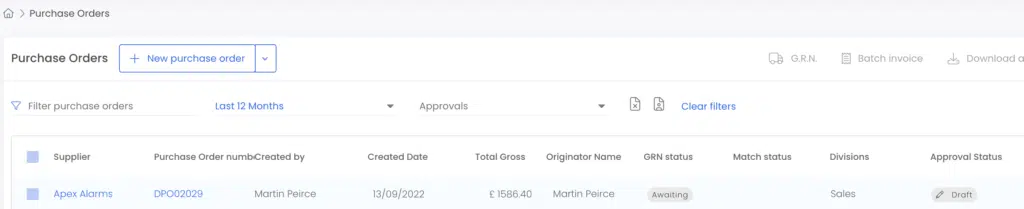
You can edit the Draft by clicking the Purchase Order number or you can click the approval status icon to reveal a menu with the ability to click Raise.
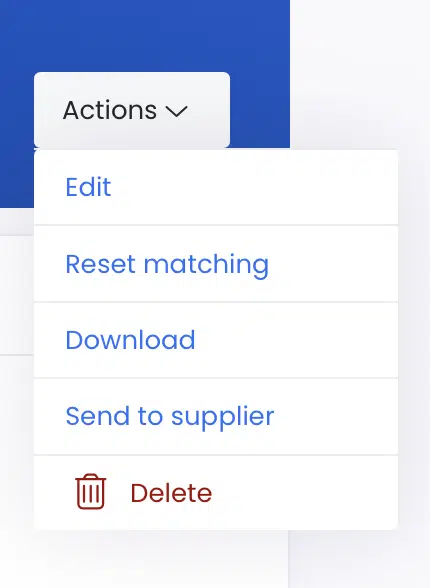
Once an order is raised, you can view it or edit it any time by clicking the purchase order number from the list view. The Document Actions menu has the following: