


Business Unit Category
Add an email signature
Coding Restrictions
Create new Business Unit
Custom Fields on Line Items
Customised labels
Date formating
Default delivery address
Division Management
Editing Email Templates
How to hide cost codes
Invoice email forwarding – Microsoft 365
Pros and Cons of Using Zahara’s Inbuilt Email Service vs. Your Own SMTP
SMTP & Email Sending
T&C on your PO Template
Invoice Processing Help Category
Auto reject supplier invoices
Auto rejecting of invoices issue
Finding an order or invoice
How to create a credit note
Invoice email forwarding – Microsoft 365
Invoice export colours
Invoice Inbox
Invoice List View
Invoice matching
Invoice Processing Explained
Month end cut offs
Negative Order Balance
Setting up Autopilot
Supplier Matching
Waiting for a GRN
Purchase Orders Category
Adding a product to an order
Adding documents to an order
Bulk importing orders
Close Orders Automatically
Closing an order
Copy PO to Buyer
Creating a Purchase Order
Deleting a PO
Duplicate Order Prevention
Editing an order
Finding an order or invoice
GRN an Order – Learn with this Guide
Grouped Purchase Orders
Import Line Items
Negative Order Balance
PO Template Editing
Product Centric Buying
Purchase Order Numbering
Purchase Order PDF
Purchase Order Prefix
Purchase Requisition Number
Quick Create a Purchase Order
Send PO to Supplier
Supplier order acceptance
What is a Purchase Order?
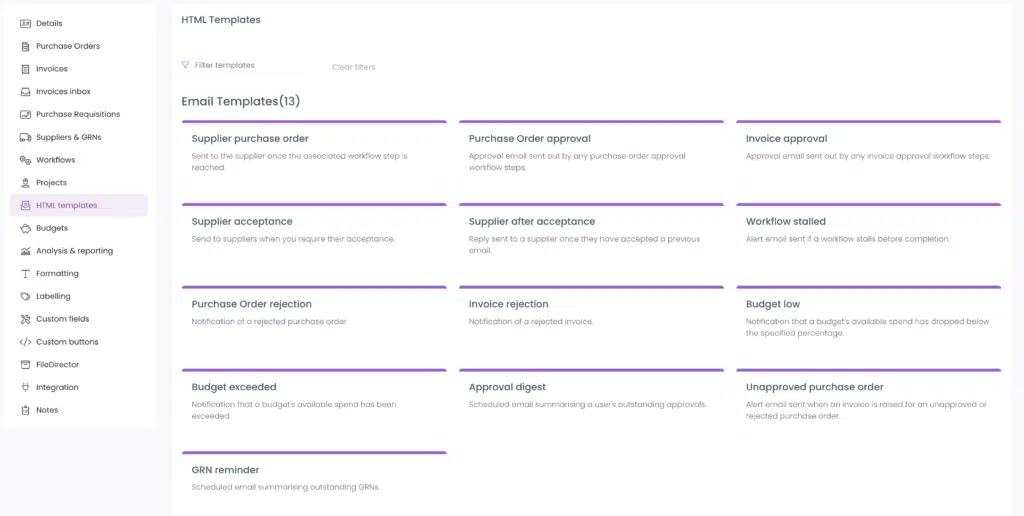
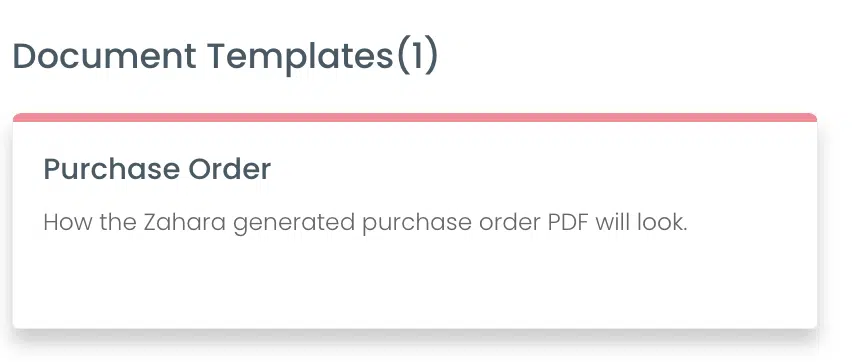
All templates are edited in Business Setting. The HTML templates tab will reveal all templates – Email, Document & Line Items,
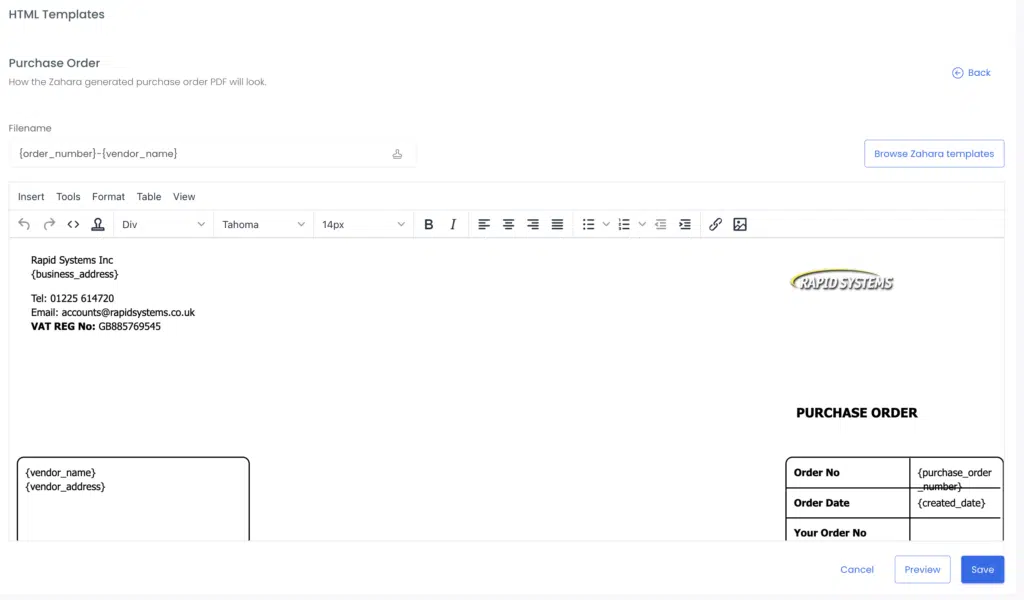
You have two templates that make up the Purchase Order that is sent to the supplier. The first template is the one you can see very easily that can either be edited in line with the WYSIWYG editor or at source by editing the HTML.
Because this is an HTML file, you can change this to anything you want. You will need to edit the HTML (View > Source Code).

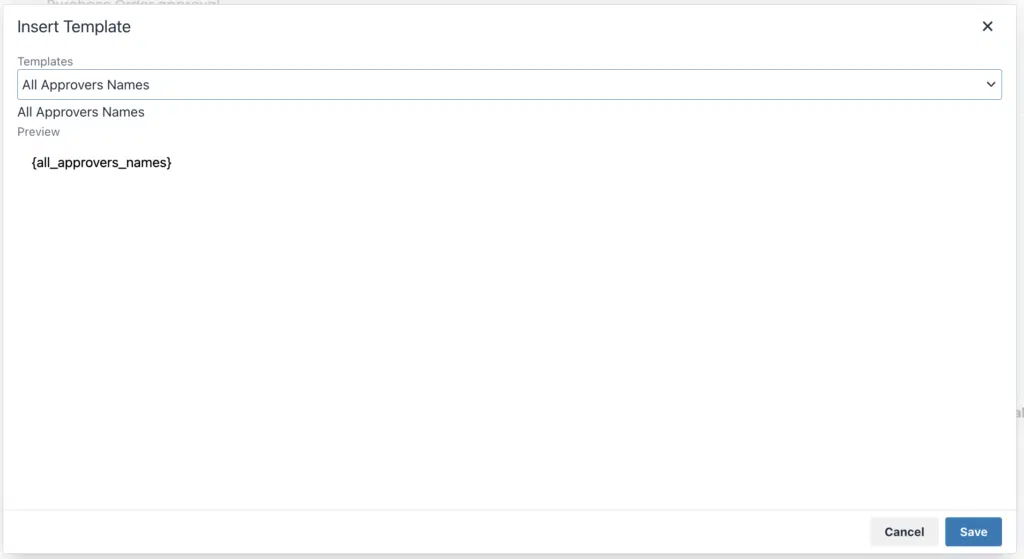
All of the fields you may wish to drop onto the template are called placeholders and can be found by clicking Insert and then Insert Template. All placeholders have { } around them. Please don’t guess them! Choose from the list of available fields.
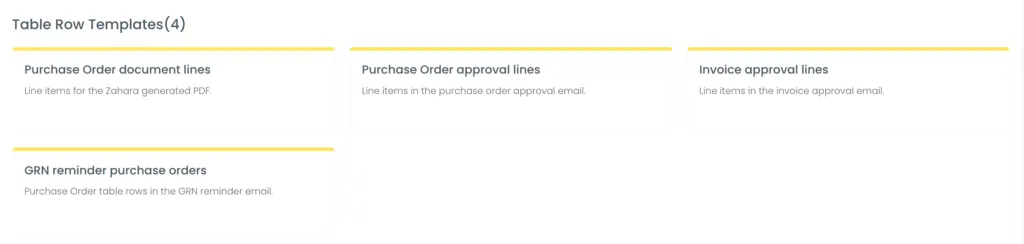
Once you click into this, you will see the WYSIWYG version which looks like this:
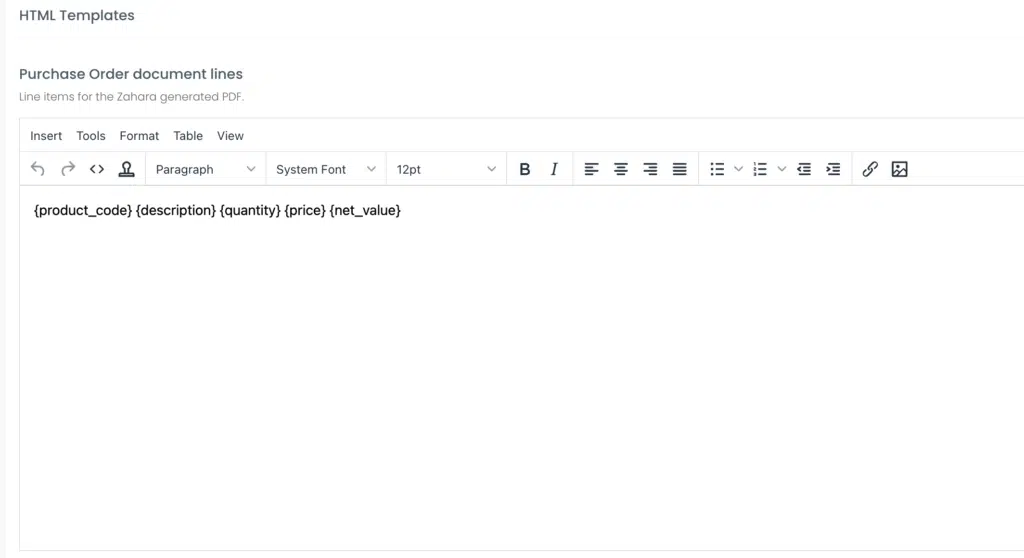
Here’s the but. You need to edit the HTML. To change the fields in the template, click View > Source Code and get to the code. This looks like this:
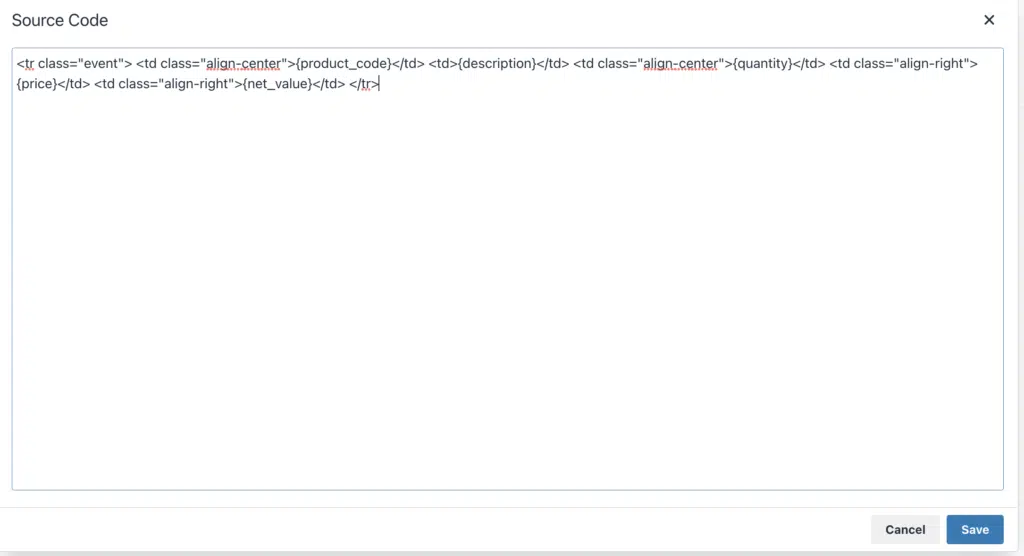
You just need to remember that the row (Table Row) starts with <tr> and will end with </tr>. You then need to wrap each of the placeholders with a <td></td> so <td>{net_value}</td>
The you might want to style the elements so <td style=”text-align: right;”>{net_value}</td>
The important thing here is you need to marry the header rows of your template with the line items template:

is married with the line items:

You will notice the {line_items} place holder in the document template. This needs to have it’s HTML maintained so is actually:
<tr>
<td colspan=”100%”>{line_items}</td>
</tr>
If you get stuck and inadvertently delete your line items, go into the HTML and paste this code in after the header row.
Although you can run a preview of your changes, it is best to create a Purchase Order that’s not in a workflow. You can then download the Purchase Order so you can see the actual PDF that is produced.
We recommend you place a link to your terms and conditions on your Purchase Order. Create a T&C PDF and place it on your website in say a /download folder. Then just add a hyperlink to it such as
It is possible to create a page break and add your terms. Here is a help article to do this:
