


Business Unit Category
Add an email signature
Coding Restrictions
Create new Business Unit
Custom Fields on Line Items
Customised labels
Date formating
Default delivery address
Division Management
Editing Email Templates
How to hide cost codes
Invoice email forwarding – Microsoft 365
Pros and Cons of Using Zahara’s Inbuilt Email Service vs. Your Own SMTP
SMTP & Email Sending
T&C on your PO Template
Invoice Processing Help Category
Auto reject supplier invoices
Auto rejecting of invoices issue
Finding an order or invoice
How to create a credit note
Invoice email forwarding – Microsoft 365
Invoice export colours
Invoice Inbox
Invoice List View
Invoice matching
Invoice Processing Explained
Month end cut offs
Negative Order Balance
Setting up Autopilot
Supplier Matching
Waiting for a GRN
Purchase Orders Category
Adding a product to an order
Adding documents to an order
Bulk importing orders
Close Orders Automatically
Closing an order
Copy PO to Buyer
Creating a Purchase Order
Deleting a PO
Duplicate Order Prevention
Editing an order
Finding an order or invoice
GRN an Order – Learn with this Guide
Grouped Purchase Orders
Import Line Items
Negative Order Balance
PO Template Editing
Product Centric Buying
Purchase Order Numbering
Purchase Order PDF
Purchase Order Prefix
Purchase Requisition Number
Quick Create a Purchase Order
Send PO to Supplier
Supplier order acceptance
What is a Purchase Order?
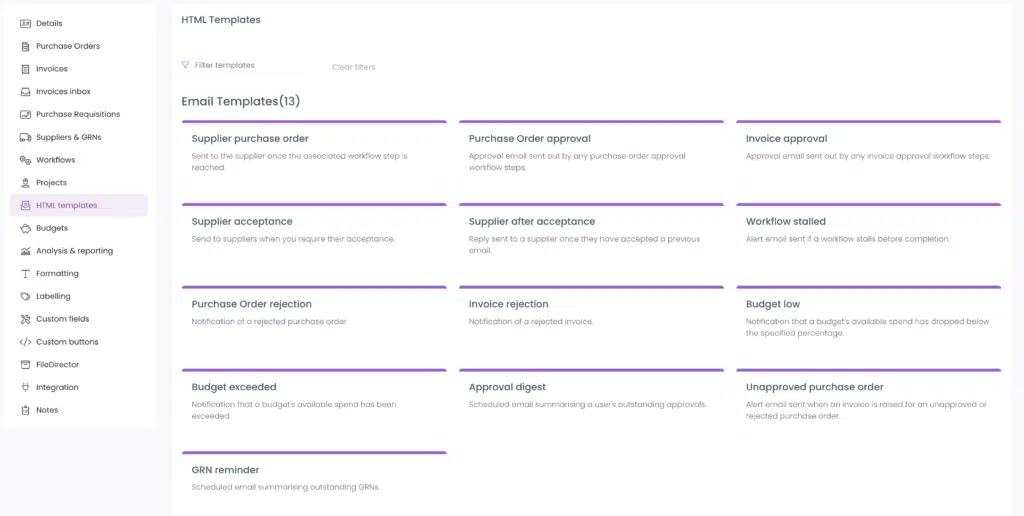
Every email sent from Zahara (apart from the password reset email), has an HTML template that you can style to suit. These are found in Business Settings and the HTML Templates tab.
By clicking into the templates above you can edit the wording and the layouts. They are all HTML so knowledge of HTML or CSS will help you style and tune these to suit. The fields that you can drop onto the templates are called Placeholders. These are fields wrapped in { } brackets.
Open your template by clicking into it.
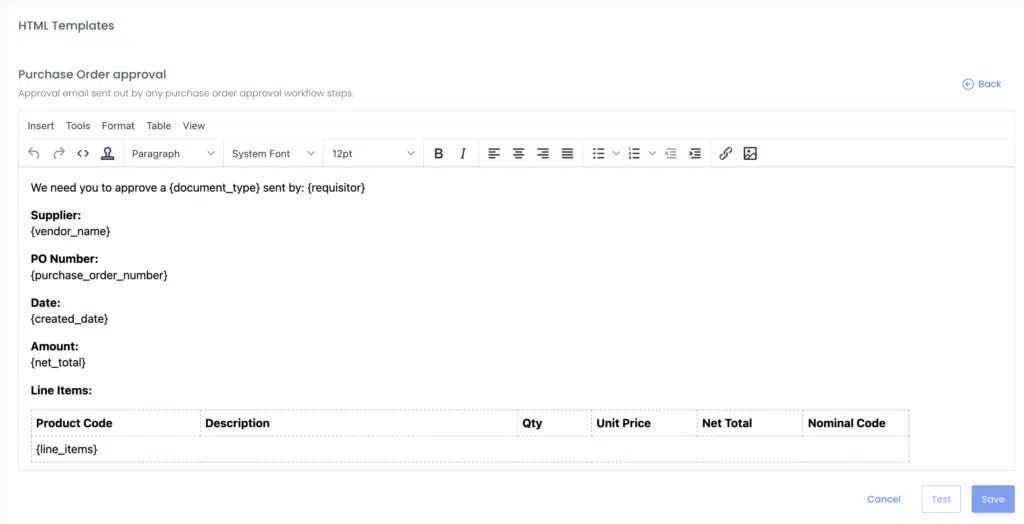
You can see here the placeholders. You can edit any of this text. The Placeholders are found by Clicking Insert in the menu and then Insert Template.
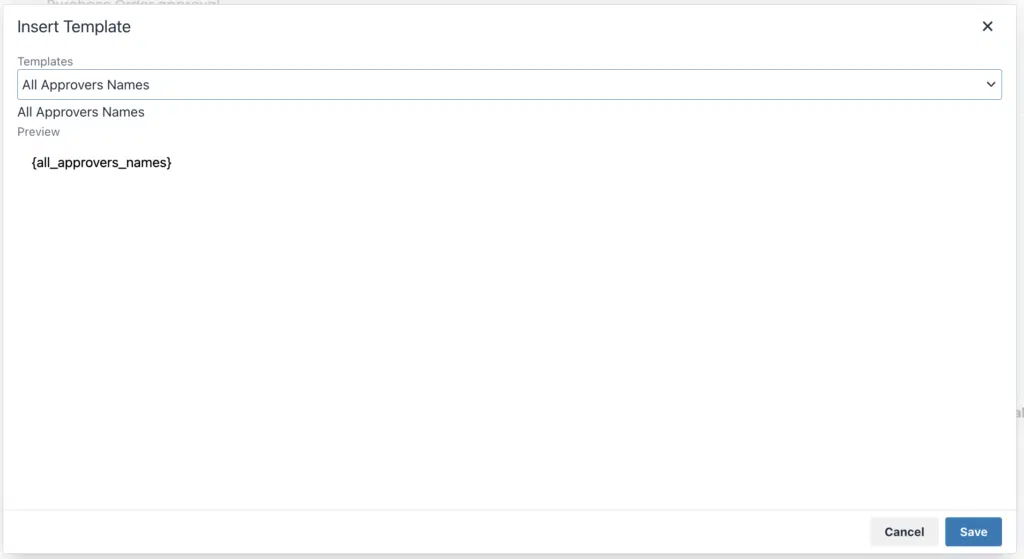
Find the placeholder you want – they are logically named – and then click Save. This will drop the placeholder onto the template. You can cut and paste them to move them around.
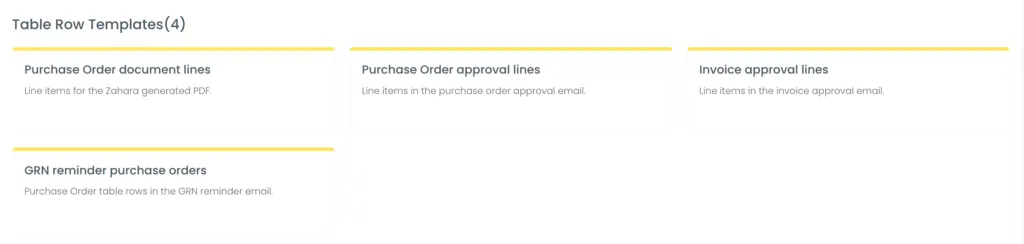
The line items template are managed separately in the yellow section. For now, we recommend you only use the Purchase Order Document Lines template and Invoice Approval Lines, which are called {line_items} & {invoice_line_items} respectively.
There are two things to know here. The first is the code that places the line items into the email template. This should be as follows: (HTML)
<tr>
<td colspan=”100%”>{line_items}</td>
</tr>
To access the HTML code, click View and then source code. So edit the HTML if you need to move the Line Items part of the template. Be careful using the WYSIWYG editor because you can inadvertently remove key parts of the HTML.
The code above calls the Purchase Document Lines template (shown in yellow). If you click in and look at this template you will see it looks something like this:
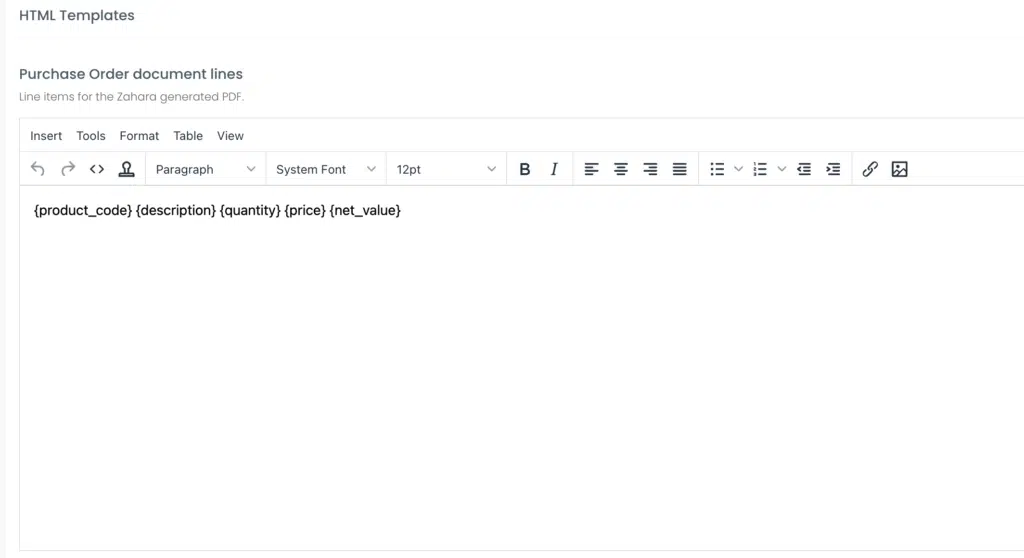
If you view the HTML you will see it is:
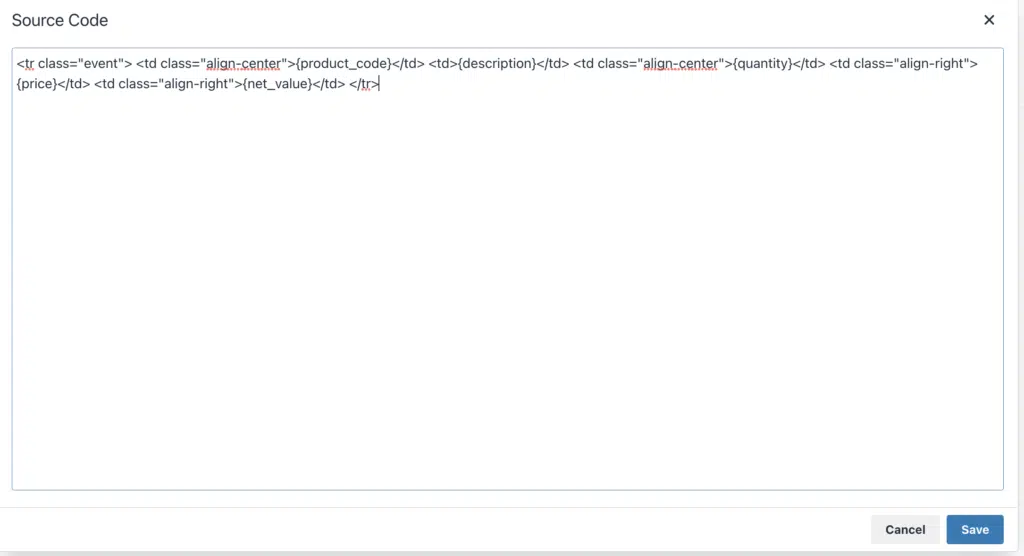
You need to maintain the HTML which starts as a <tr> and ends with a </tr> (table row)
Each field needs to be wrapped in a <td></td> (table data)
You can style these to suite with code such as <td style=”text-align: right; margin-right: 10px;”>{net_amount}</td>
So in summary, you need to marry the header fields in the Email template with the individual fields in the line items template. The invoice line items placeholder can include the Nominal codes and other internal specific information whereas the Purchase Order Document Lines template is shared with the Purchase Order PDF so your supplier wont want to be burdened by your coding.
