


Business Unit Category
Add an email signature
Coding Restrictions
Create new Business Unit
Custom Fields on Line Items
Customised labels
Date formating
Default delivery address
Division Management
Editing Email Templates
How to hide cost codes
Invoice email forwarding – Microsoft 365
Pros and Cons of Using Zahara’s Inbuilt Email Service vs. Your Own SMTP
SMTP & Email Sending
T&C on your PO Template
Invoice Processing Help Category
Auto reject supplier invoices
Auto rejecting of invoices issue
Finding an order or invoice
How to create a credit note
Invoice email forwarding – Microsoft 365
Invoice export colours
Invoice Inbox
Invoice List View
Invoice matching
Invoice Processing Explained
Month end cut offs
Negative Order Balance
Setting up Autopilot
Supplier Matching
Waiting for a GRN
Purchase Orders Category
Adding a product to an order
Adding documents to an order
Bulk importing orders
Close Orders Automatically
Closing an order
Copy PO to Buyer
Creating a Purchase Order
Deleting a PO
Duplicate Order Prevention
Editing an order
Finding an order or invoice
GRN an Order – Learn with this Guide
Grouped Purchase Orders
Import Line Items
Negative Order Balance
PO Template Editing
Product Centric Buying
Purchase Order Numbering
Purchase Order PDF
Purchase Order Prefix
Purchase Requisition Number
Quick Create a Purchase Order
Send PO to Supplier
Supplier order acceptance
What is a Purchase Order?
Projects are a ring-fencing of spend and can be used in a number of ways. They are designed to be used for job costs or project costs. However, if you are a Xero user you can elect to use projects in Zahara with a tracking category in Xero. For each project, you can see the orders and invoices and also set a granular budget.
First off, head to Business > Projects
Now click ‘New Project’
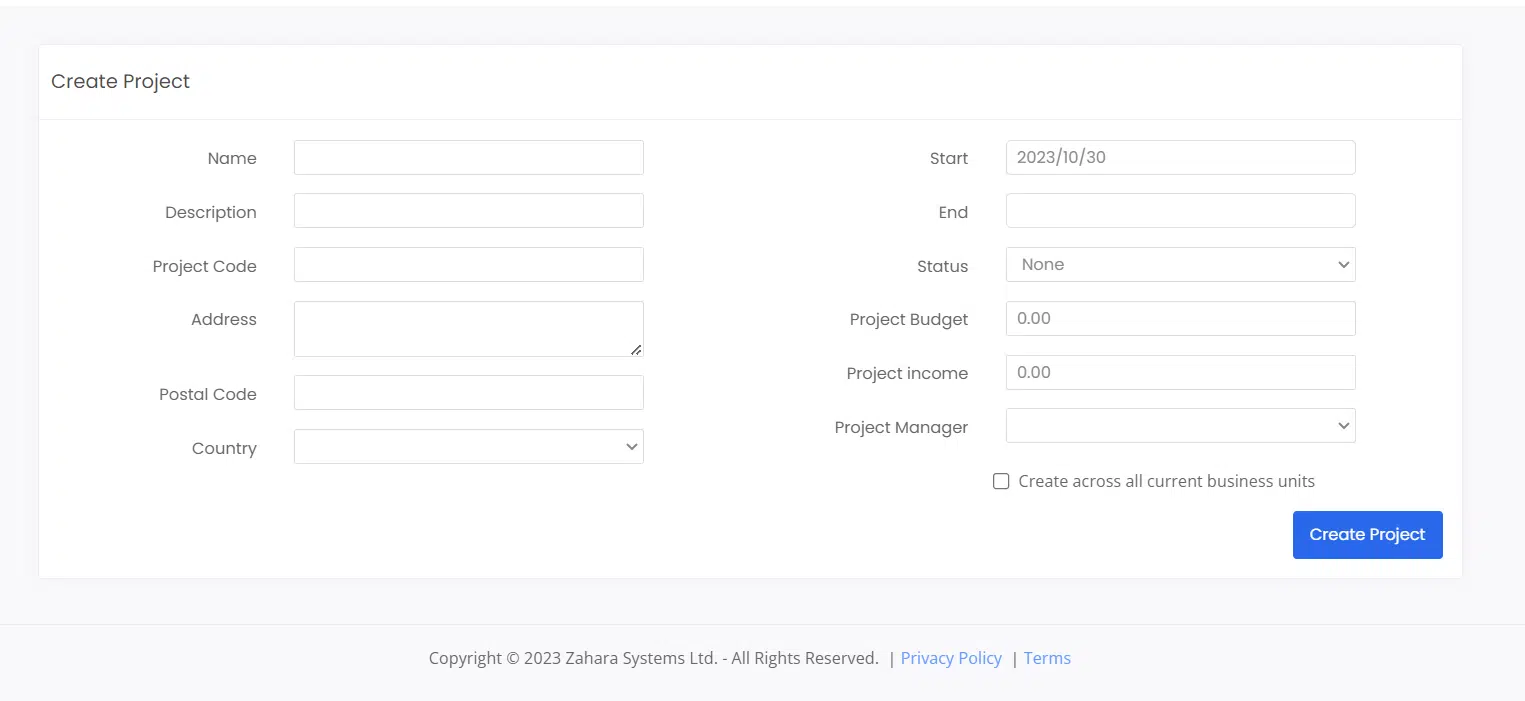
Now click Add.
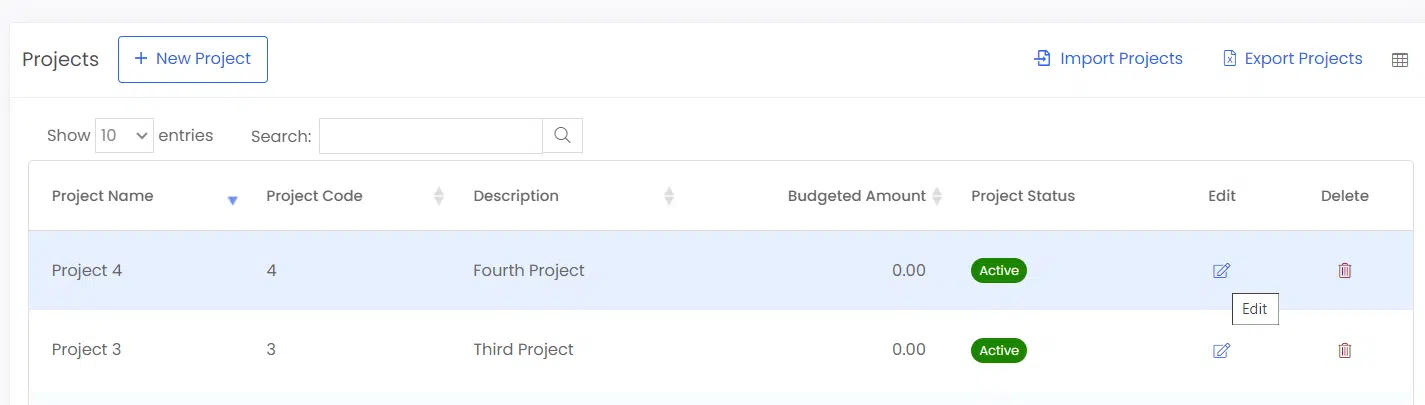
From the project list view, you can see the status of projects. To view the contents of a project, click the edit button. Users will need the project edit permission to see inside a project.
If a project doesn’t have a green status icon, it won’t show up in the list view, so make sure any projects you want to show have an enabled status.
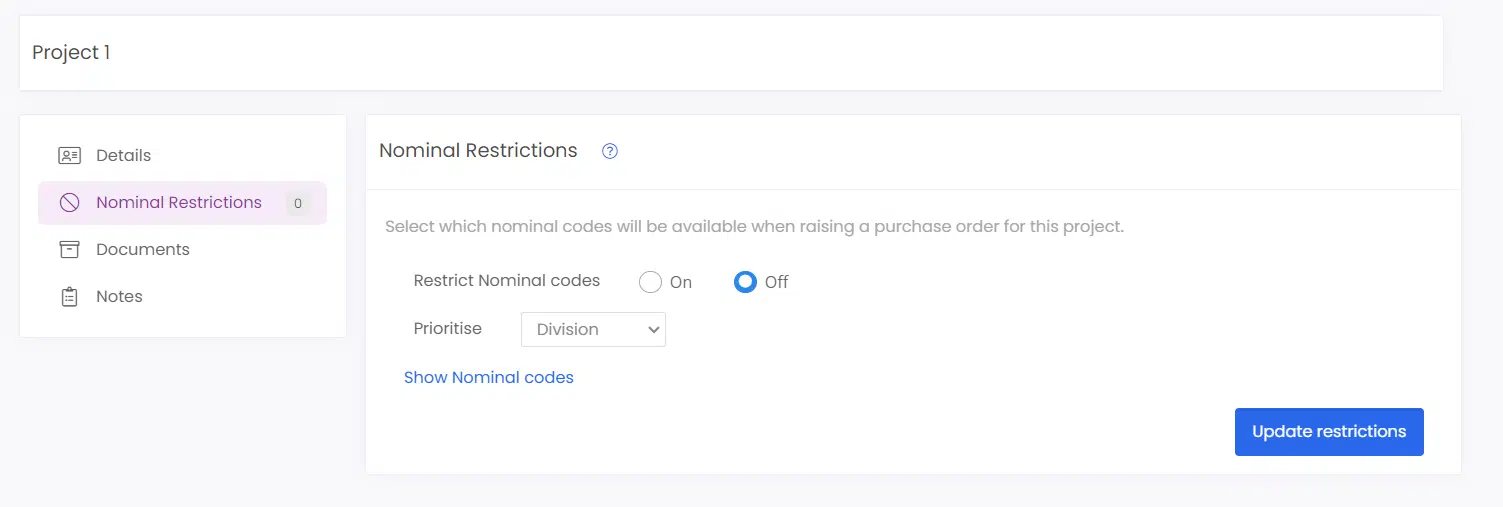
Inside the project, you can set what nominal codes can be used when someone is raising an order against this project. If a budget is created – see the section below – then nominals can be set to the budget.
You can also head into a division and set the project restrictions. This means if you only want a division to be able to buy against 3 active projects. You can set them in the division.
Click the Nominal restrictions tab. Switch Nominal Restrictions to On.
Then click Show nominal codes to select the nominal codes you wish to use for the restrictions.
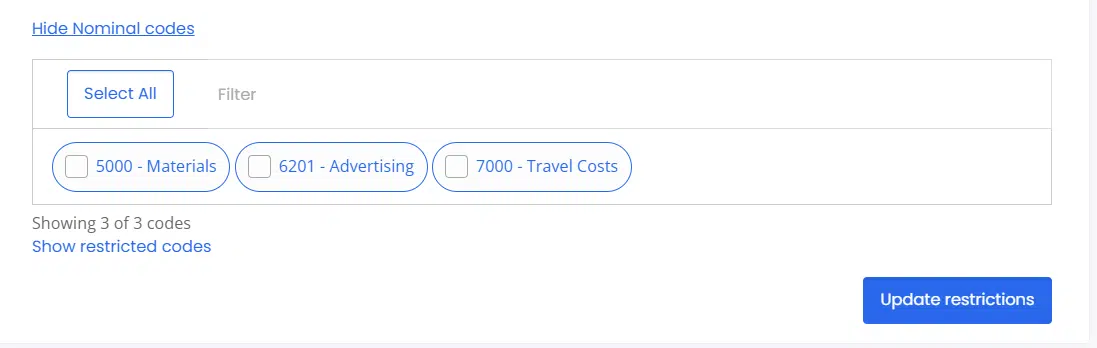
In the example above, the three green codes will be the only codes available to choose when creating a Purchase and this project is selected.
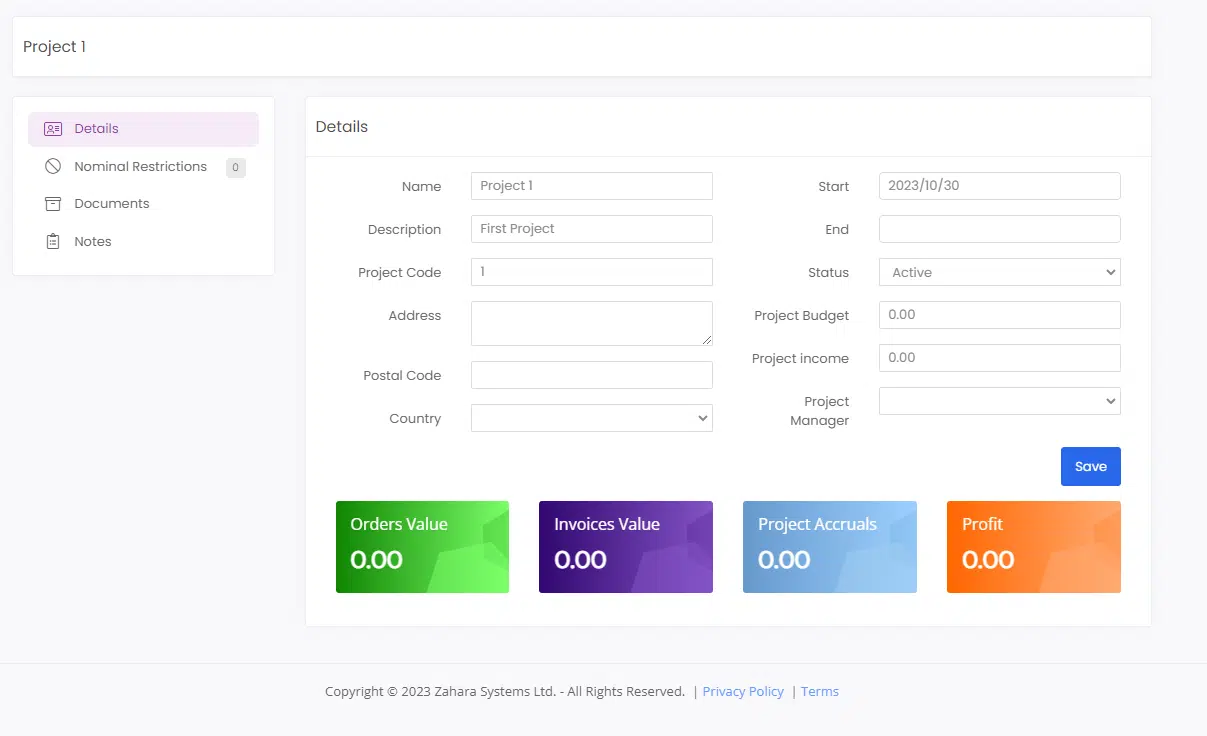
Exporting the project list will calculate the positions for you as well as shown below. There is an additional help article for this. Click here

You may want a granular budget on your project. You can create a budget in Business > Budgets and then assign it to the project. A budget can be based on nominal codes or cost codes (or whatever you have named them to). You can then see the progress of the budget inside the project looking for any overspend. You can also use budget parameters in the approval and workflow processes with the over budget condition. Please view our Knowledge Base guides on creating Budgets for more information.
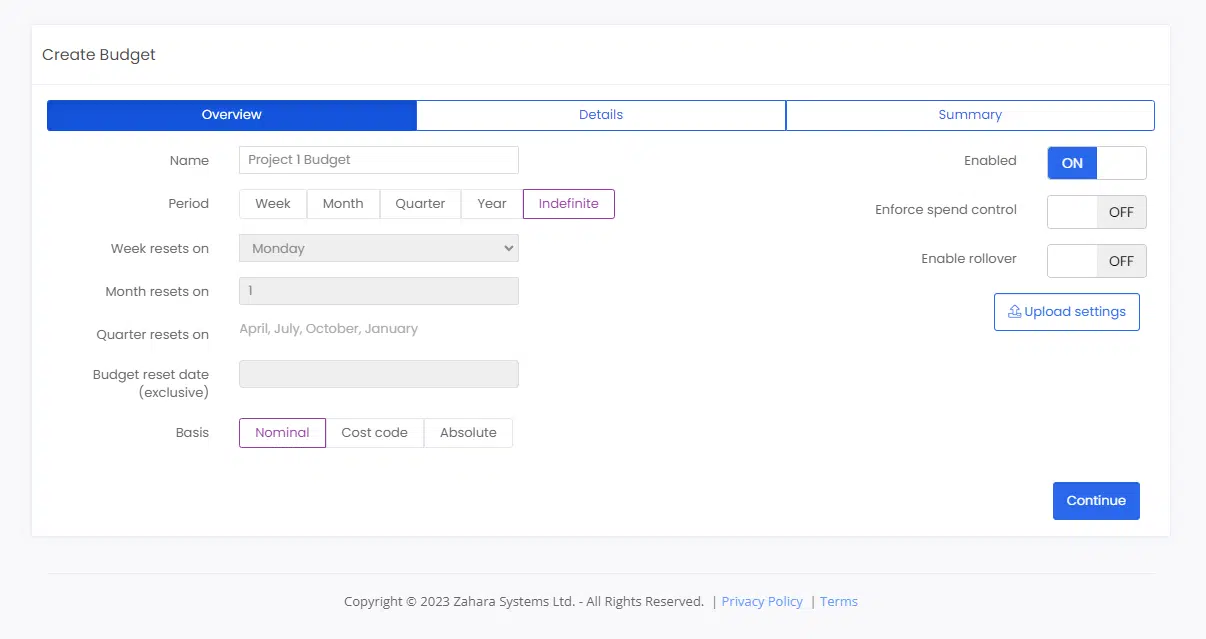
Give the budget a name and then set it to Indefinite.
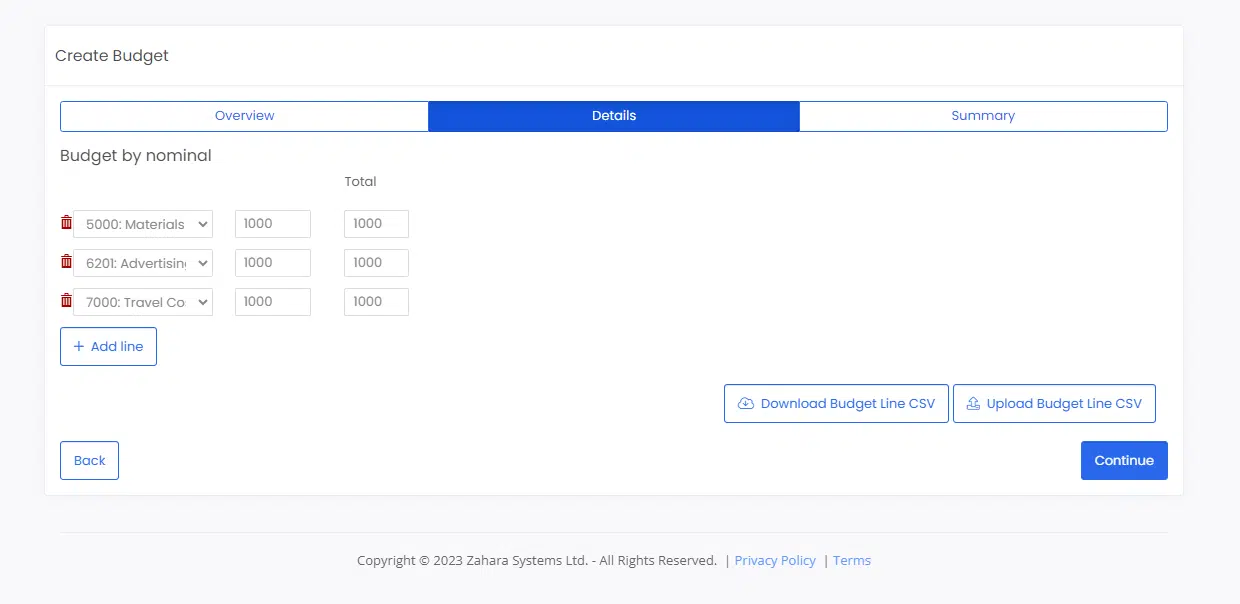
As you can see we have three different nominal codes where we can spend different amounts.
Click next and commit the changes
Now go back into the budget and assign it to the project.
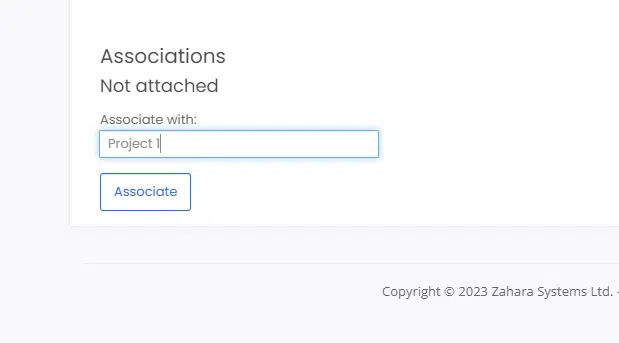
Remember to click next and go back through the budget again to save the changes.
If you now edit the project you should see the budget panel.
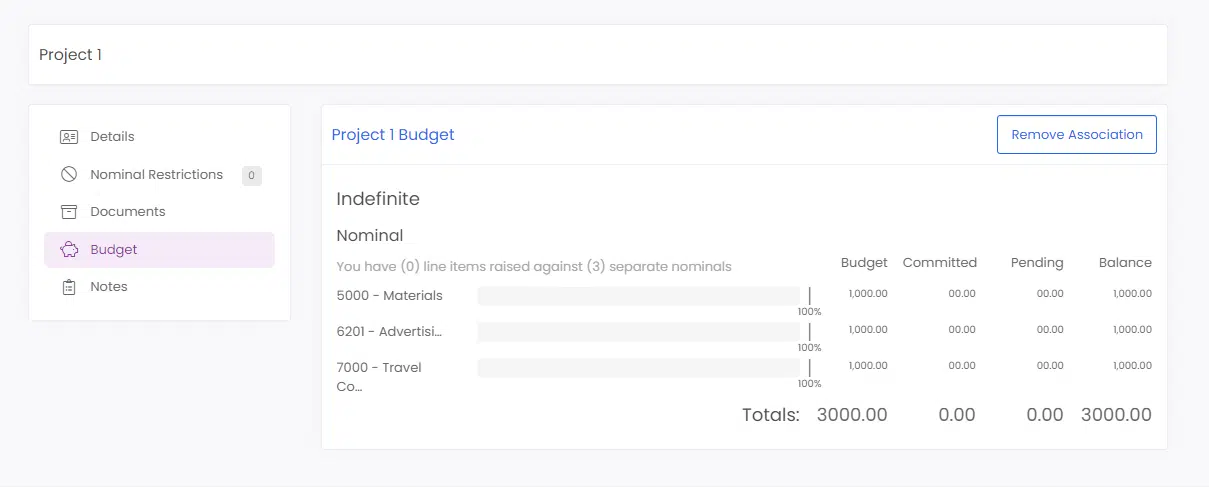
After creating an order with a value, you will see this represented on the project budget preview- this is a good way of seeing simplified spend against nominals without referring to a more in-depth report.
