


Business Unit Category
Add an email signature
Coding Restrictions
Create new Business Unit
Custom Fields on Line Items
Customised labels
Date formating
Default delivery address
Division Management
Editing Email Templates
How to hide cost codes
Invoice email forwarding – Microsoft 365
Pros and Cons of Using Zahara’s Inbuilt Email Service vs. Your Own SMTP
SMTP & Email Sending
T&C on your PO Template
Invoice Processing Help Category
Auto reject supplier invoices
Auto rejecting of invoices issue
Finding an order or invoice
How to create a credit note
Invoice email forwarding – Microsoft 365
Invoice export colours
Invoice Inbox
Invoice List View
Invoice matching
Invoice Processing Explained
Month end cut offs
Negative Order Balance
Setting up Autopilot
Supplier Matching
Waiting for a GRN
Purchase Orders Category
Adding a product to an order
Adding documents to an order
Bulk importing orders
Close Orders Automatically
Closing an order
Copy PO to Buyer
Creating a Purchase Order
Deleting a PO
Duplicate Order Prevention
Editing an order
Finding an order or invoice
GRN an Order – Learn with this Guide
Grouped Purchase Orders
Import Line Items
Negative Order Balance
PO Template Editing
Product Centric Buying
Purchase Order Numbering
Purchase Order PDF
Purchase Order Prefix
Purchase Requisition Number
Quick Create a Purchase Order
Send PO to Supplier
Supplier order acceptance
What is a Purchase Order?
Your license with Zahara is for named users. This means if you need to register a new user, you need to make sure your license count will allow for a new user. If you are taking a trial, then you have unlimited users for the first 30 days so add as many as you require.
To add a new user, and to see the Admin > Settings menu, you need to be a tenancy admin. This is enabled on a user by user basis under the users main settings. Under this menu you will find user management. Here you can add, assign and remove users.
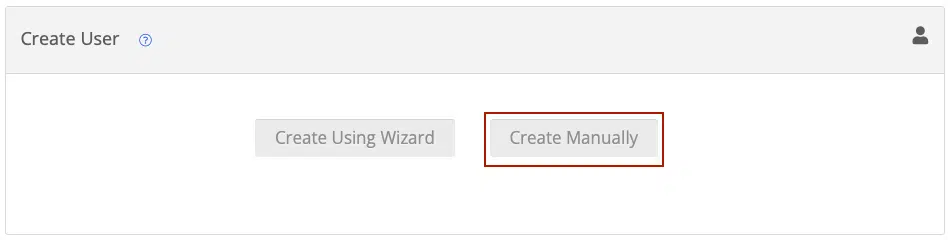
You have two choices – Using the Wizard or Adding the user Manually. The key thing to remember, is that once a user is created, they need to be assigned to a Division, so Divisions should be created first.
Your process then for adding users is:
Adding Users Manually
Add your users First Name, Last Name, Email & Job Title.
There is a spare field called AD User – ignore this for now.
The only additional option here is to “Suppress Registration Email” – If you switch this to on, the user will not receive their registration email – where they will set their password.
You can send this at a later date.
Click Create
watch the video to understand how users work.
You now have to assign a membership and permissions
There are three principle sections of the user management – Users, Divisions, and the right hand-side with the Business Units.
The first step is easy, click a user or multiple users in Box one and tick a Division box below – then click Add
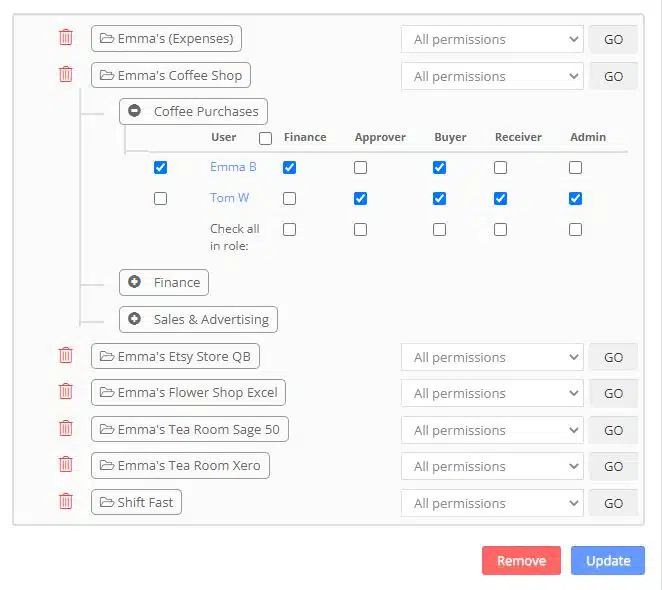
The users will now be assigned to the Divisions. Next up, move over to the right hand side panel and expand out your Business Unit to reveal your divisions as shown below:
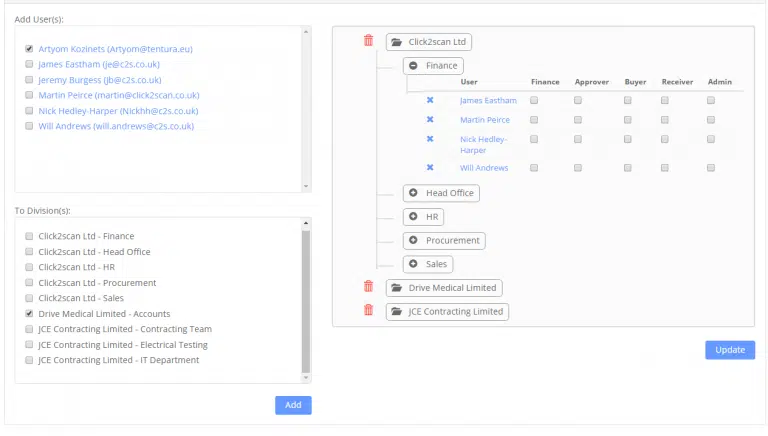
(To reveal the Divisions, click on the Business Unit name – in the example above, click where it says “Click2Scan Ltd”)
When you click the role tick box, certain permissions are set. The role also provides a different dashboard. Read the article on Roles – you have a choice of
Remember to click Update at the bottom – as shown above.
By ticking each of the above a matrix of tick boxes is applied to the user. Below are the permissions:
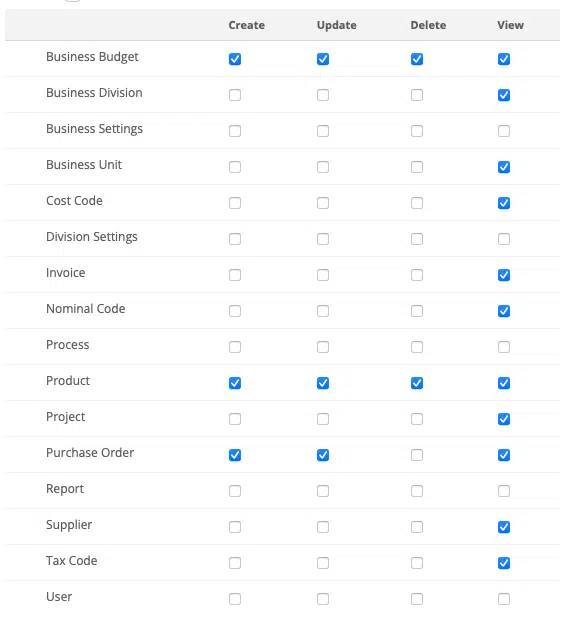
Buyer:
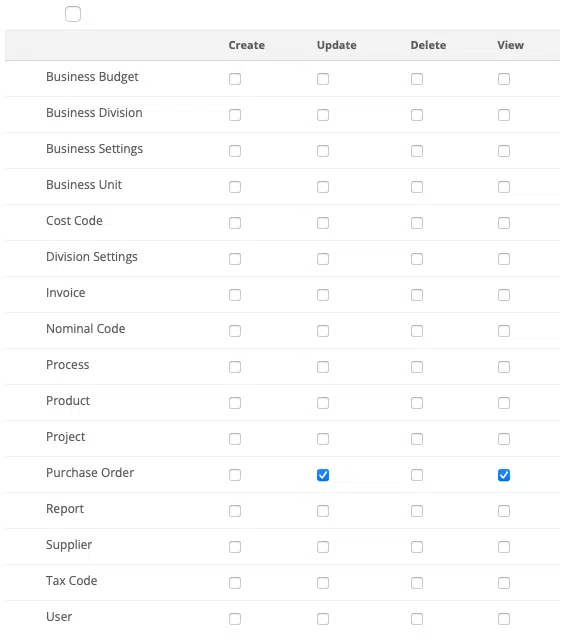
Approver
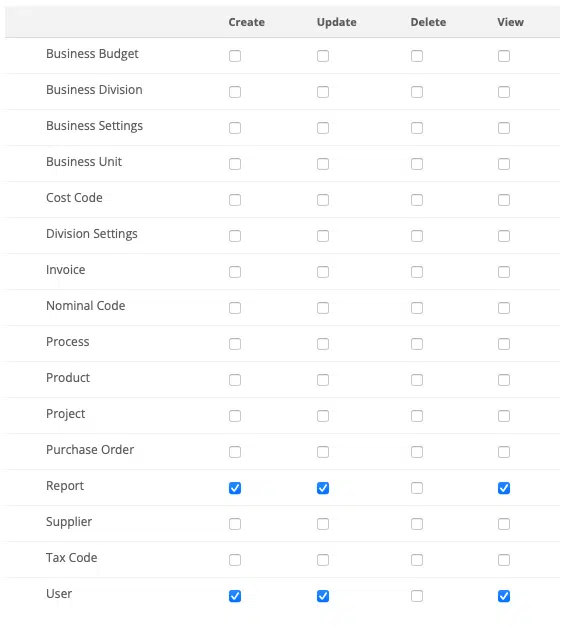
Finance
Admin
Receiver
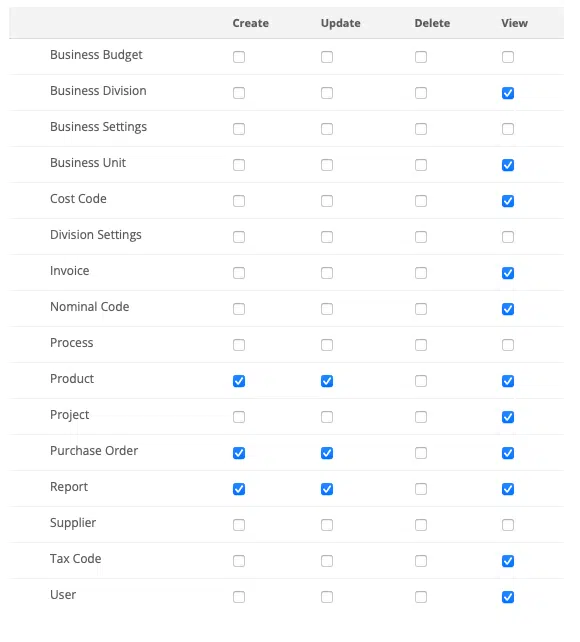
Grouping Roles
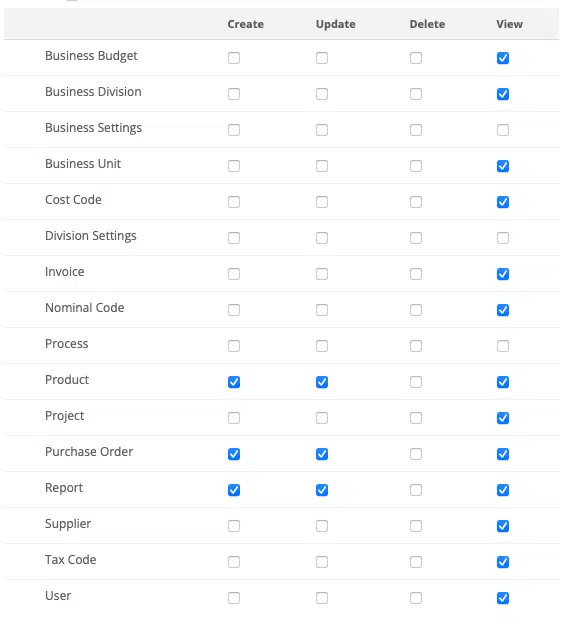
A member of the finance team is expected to have a full permission set without user management. These power users shouldn’t be restricted too much. You can mesh the roles together to group the permissions. As an example, below is the permission matrix of a Approver, Buyer, Receiver
If you click a users name – anywhere you see it in this section, you will be taken into their individual record where you can edit their details and their permissions. You can also set their password manually, or their absence settings.
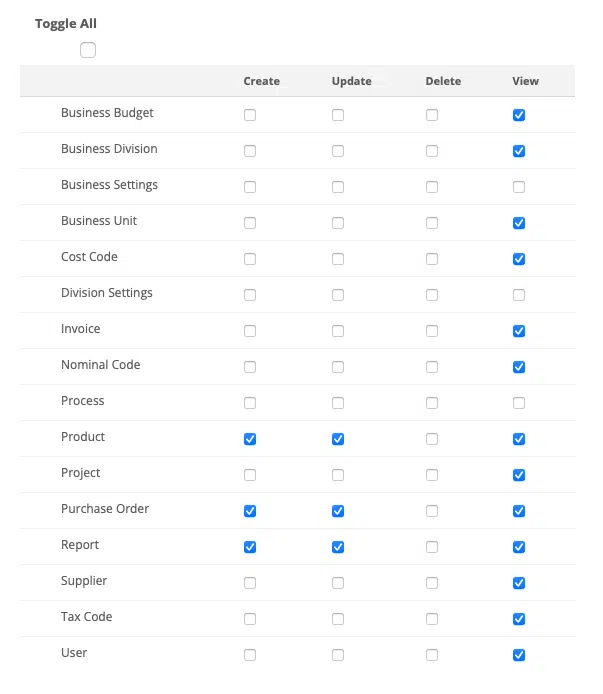
When roles are assigned to users, default permissions are set for the users but you may still not be quite sure about some of the permissions available.
Below are the current permissions you will find in Zahara:

Firstly we have the columns:
We then have the “Toggle All” function which allows you to tick/untick all the boxes at once, usually used for Tenancy Admins.
We then have the areas:
You will also find the below permissions in this area:
Removing a user from a division without deleting them from the system completely, is quite straight forward. On the right hand side panel expand out your Business Unit to reveal your divisions as shown below:
Tick the box to the left of the user name you want to remove, and then click the “remove” button at the bottom. They will no longer have access to this division.
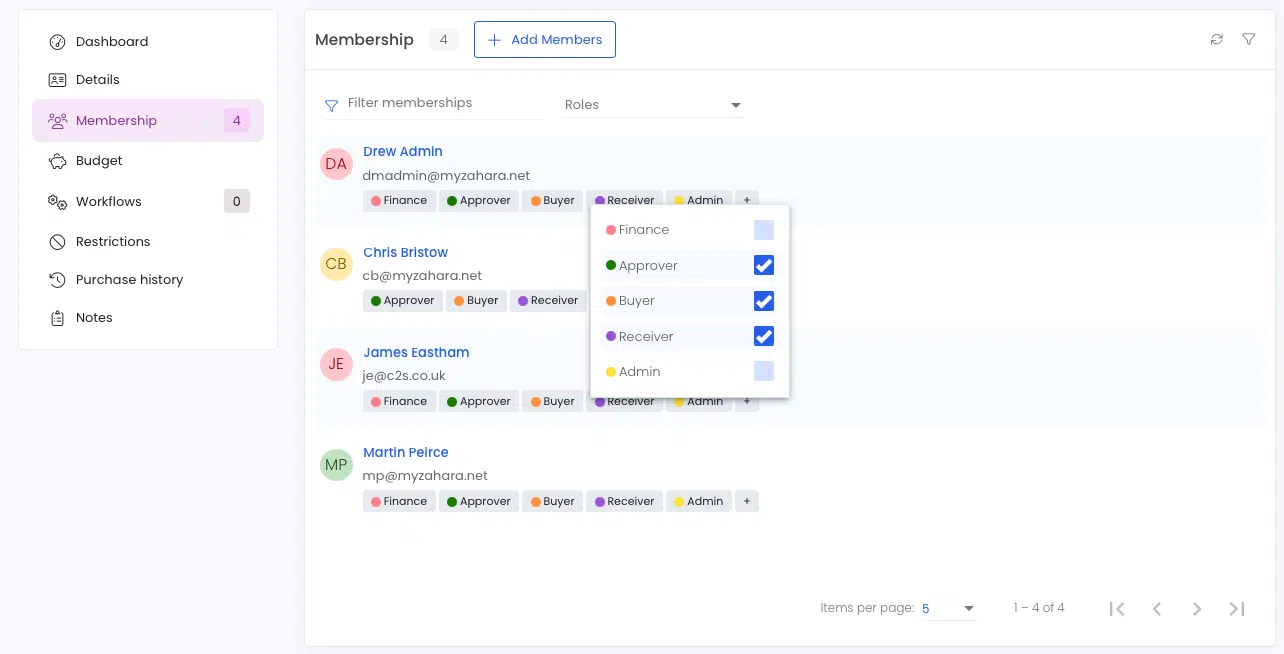
You can add users and assign roles in Divisions as well. The user must already be created as part of the steps above. However, in each individual Divisions you can assign new users as shown below:
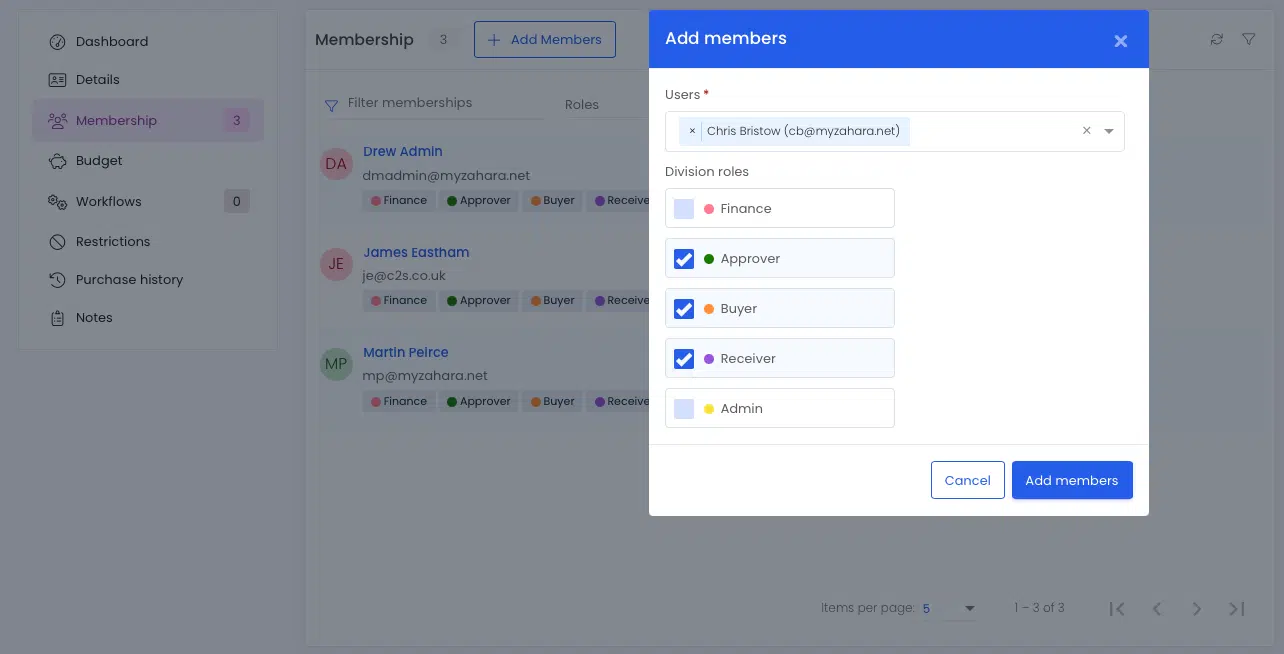
You can also refine their roles and therefore their permission sets by clicking the + next to listed users
Our advice is to think about some of the key restrictions you may need:
