


Business Unit Category
Add an email signature
Coding Restrictions
Create new Business Unit
Custom Fields on Line Items
Customised labels
Date formating
Default delivery address
Division Management
Editing Email Templates
How to hide cost codes
Invoice email forwarding – Microsoft 365
Pros and Cons of Using Zahara’s Inbuilt Email Service vs. Your Own SMTP
SMTP & Email Sending
T&C on your PO Template
Invoice Processing Help Category
Auto reject supplier invoices
Auto rejecting of invoices issue
Finding an order or invoice
How to create a credit note
Invoice email forwarding – Microsoft 365
Invoice export colours
Invoice Inbox
Invoice List View
Invoice matching
Invoice Processing Explained
Month end cut offs
Negative Order Balance
Setting up Autopilot
Supplier Matching
Waiting for a GRN
Purchase Orders Category
Adding a product to an order
Adding documents to an order
Bulk importing orders
Close Orders Automatically
Closing an order
Copy PO to Buyer
Creating a Purchase Order
Deleting a PO
Duplicate Order Prevention
Editing an order
Finding an order or invoice
GRN an Order – Learn with this Guide
Grouped Purchase Orders
Import Line Items
Negative Order Balance
PO Template Editing
Product Centric Buying
Purchase Order Numbering
Purchase Order PDF
Purchase Order Prefix
Purchase Requisition Number
Quick Create a Purchase Order
Send PO to Supplier
Supplier order acceptance
What is a Purchase Order?
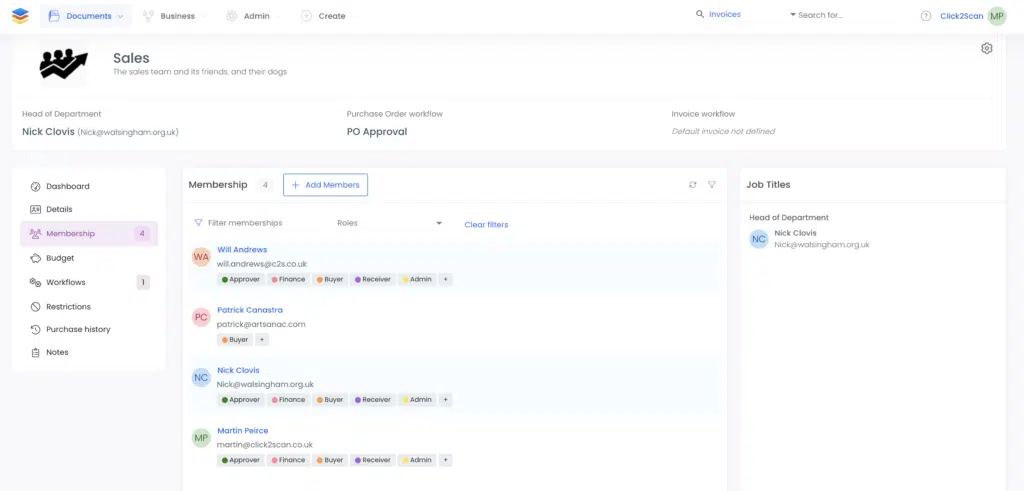
Divisions are the natural groupings of people inside your organisation. These are your teams or departments. This is probably the most important part of Zahara because here in one place you have:
To edit a Division you need to have the Business Division Update permission. A user with the Business Division View permission can view everything in a read-only mode.
Before you can get started on creating your workflow approvals you need to make sure you have the right people assigned to your team and that they have the right roles. The tenancy admins will be expected to create the users but once created, someone with Division edit permissions can assign the users to the Division and set their roles. This is all managed in the Membership tab on the left hand side:
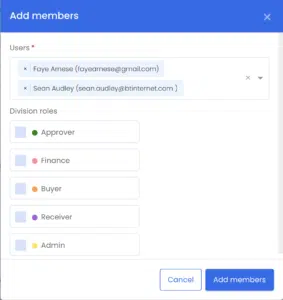
Adding members.
To add users (they have to have been created already under Admin > Settings) you click Add Member. You can multiple select users and then set their roles as shown below. Their individual permissions can be tuned by the Tenancy Admin but this allows the Division manager (Department Manager / Team Leader) to have more autonomy.
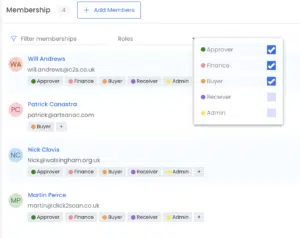
Editing Users
You can remove a user from the Division by clicking their name.
You can change their role by clicking the + next to their Roles and then selecting the correct role.
Once you have your users set you can use the Details tab to set defaults like the Division Head. Click the edit icon on the right-hand side. You can now set the:
Purchase Order Prefix
You can assign a Prefix to identify a purchase order as coming from this Division. This could be a number or some characters. example 101- would be the value you add in this field to create a PO Number of 101-1001
Default Cost Code
The cost code is a versatile codeing list on the line items. You can populate this field to ensure all Purchase Orders are created with this field populated to your choice.
Department ID
This is a spare field that can be used in a finance system like Sage 50, where you require the Divisions to align with your departments. Here you can set the Division to have the same code as your department.
VAT Number
You can use this field value on your purchase order if required. There is a placeholder for this value in HTML templates.
Address Fields
All of the address fields have corresponding placeholders for the HTML templates that you can edit, such as the Approval Emails or Purchase Order Template.
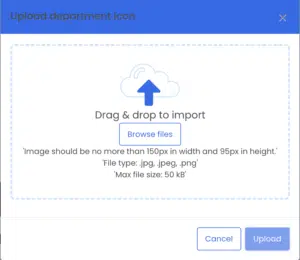
Division Icon
Click the default Division icon to reveal the choice of icons you can have to represent your Division. You can also upload your own icon provided it meets the criteria below.
You manage your Division workflows from this tab. We have dedicated articles on workflow management/approvals – click here – to read the detailed view but here under Division management you can:
Clicking on any of the Order or Invoice approval will reveal the steps of the workflow as shown below:
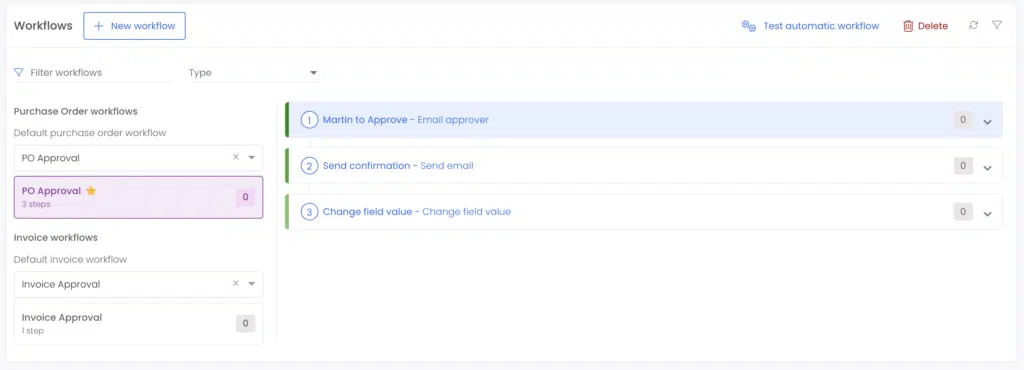
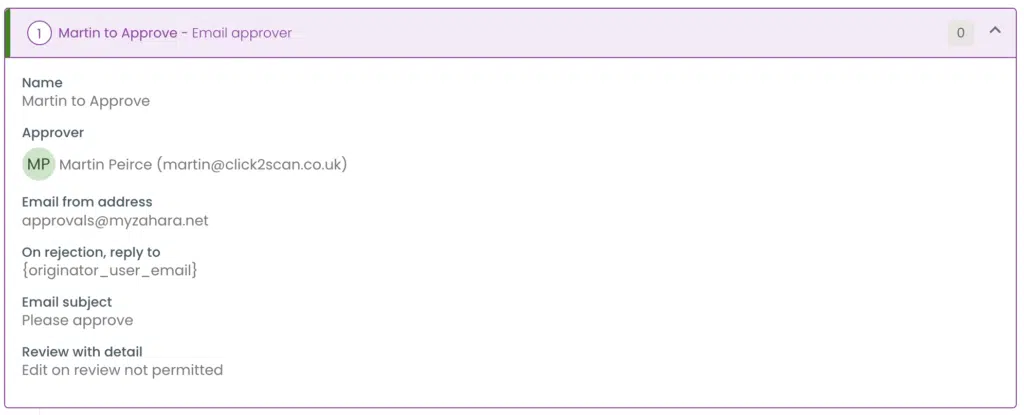
Clicking anyone of the steps on the right will show you the details:
Default workflows will have a yellow star against them.
You can edit any workflows or create new. There is a wizard approach to adding workflows and generating the conditions. Example, let’s create an invoice approval with an Export step.
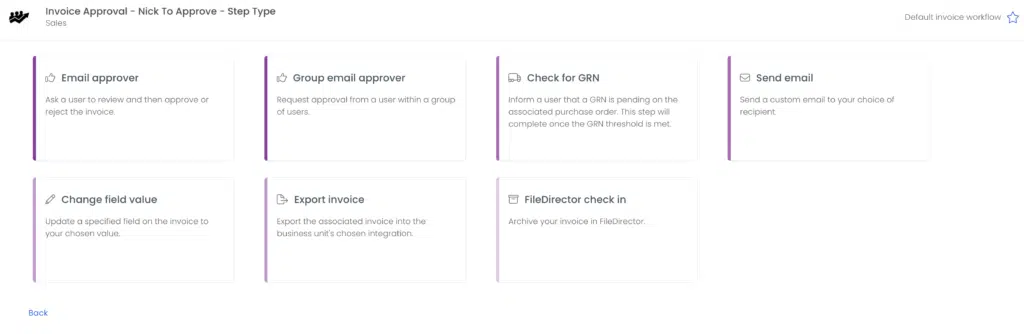
You have the choices above as your workflow steps. Add the ‘Email approver step’ by clicking it
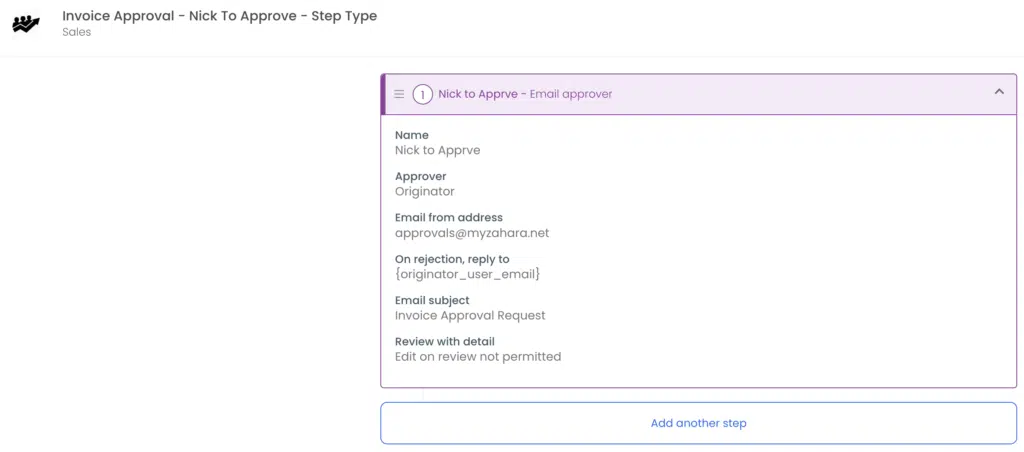
Now we can add the Export invoice step:
You should now see your workflow in the list and clicking it will reveal those two steps.
Workflow filtering
If you have a lot of workflows in your division, you can use the workflow filter to zoom in on the workflow you want to find.
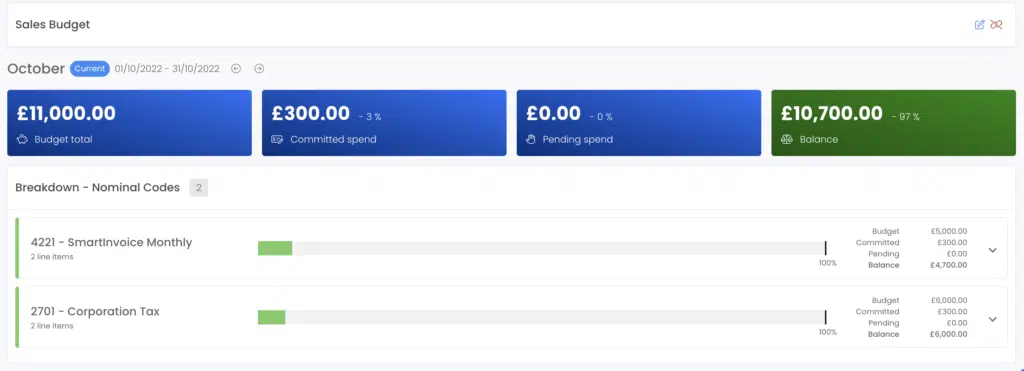
The Budget tab will display the Divison’s budget (if one has been created). This allows you to see
The finance team will have a Chart of Accounts for the whole business but they may want to restrict the choice of codes that the Division can use. This is set in the Restrictions tab of Divisions.
There is a choice of restrictions for
Once this is set, you can move onto the second part of the screen where you can select Codes that will be shown.
The first thing you will notice is a switch to set the restrictions to the Budget. This make sense if a Division budget is in place for a selection of nominal codes. This would then automatically align the nominal codes and make sure the buyer can only buy against the budget. If this is switched off, you can select codes as shown below:
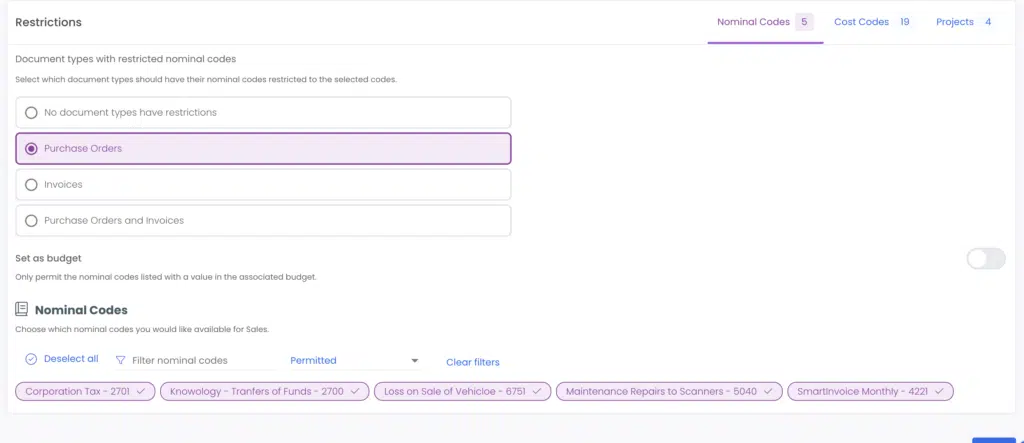
In this example, 5 codes have been set and the View is filtered to Permitted.
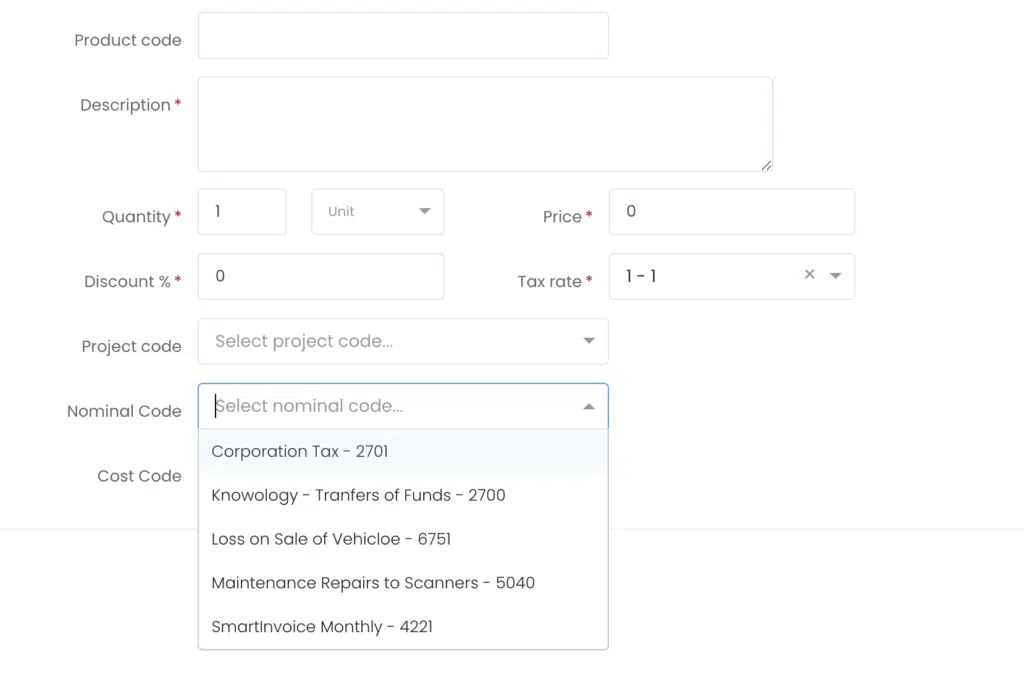
Once set, when the user raises a purchase order, they will only see these codes as shown below:
This tab will allow you to see the Orders and Invoices that relate to this Division. You can filter and search here as well as add a Date range.
You can download all documents or selected documents to CSV which will export the list view that you see on the screen.
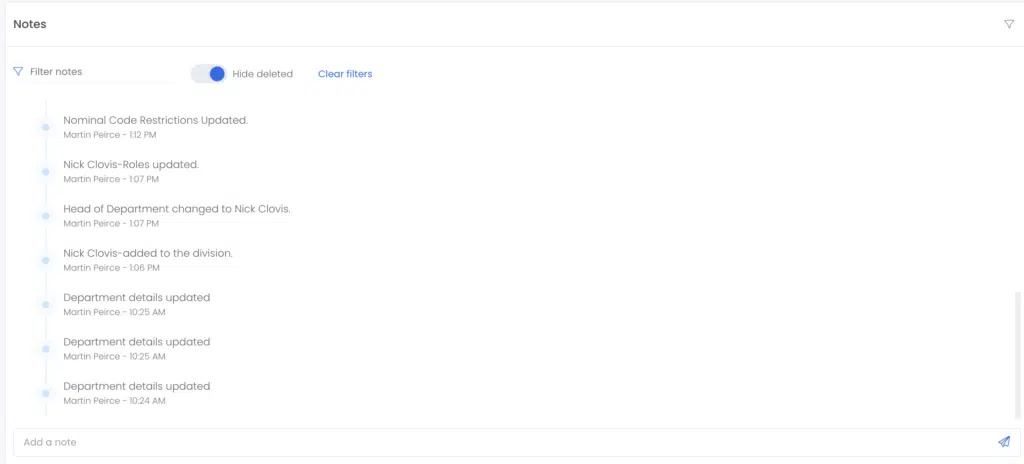
The notes section has a rolling audit trail of any edits and changes to the Division as well as allowing you to add your own notes.
The Division view shows all Divisions in the Business and allows you to find and filter on a specific Division
You can also filter down on Bookmarked Divisions – one’s you particularly want to work with. To Bookmark a Division, just click the Bookmark icon
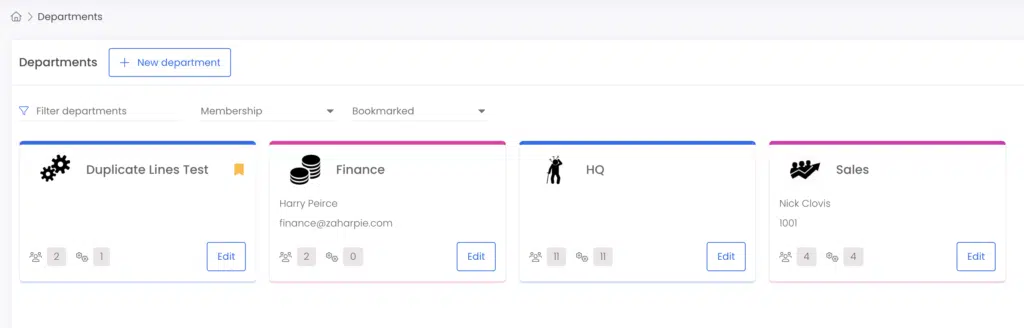
The view here as shown above also shows the number of users and number of workflows in that Division.
Use the “New Division” button to create a new Division. Follow the Wizard to complete all of the required fields.
As part of the creation you can:
